My kids love going to the library to get new books and have some variety in their nightly reading. My 1st grader especially gets bored reading the same books we have in our collection at home, which is actually quite large because I LOVE books, but she does like to have new ones to choose […]
The post DIY Embellished Book Bag appeared first on Paper Crush.
]]>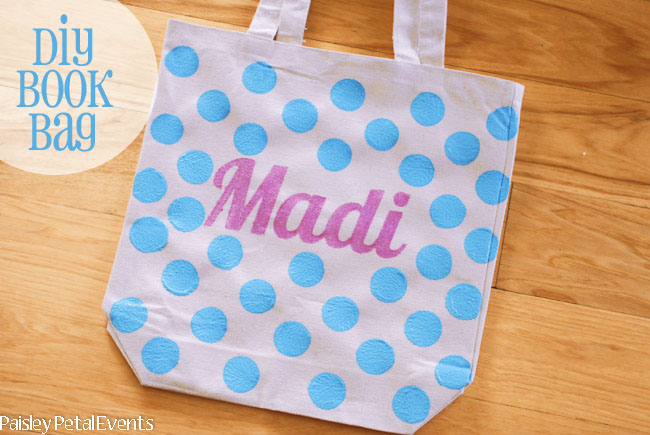
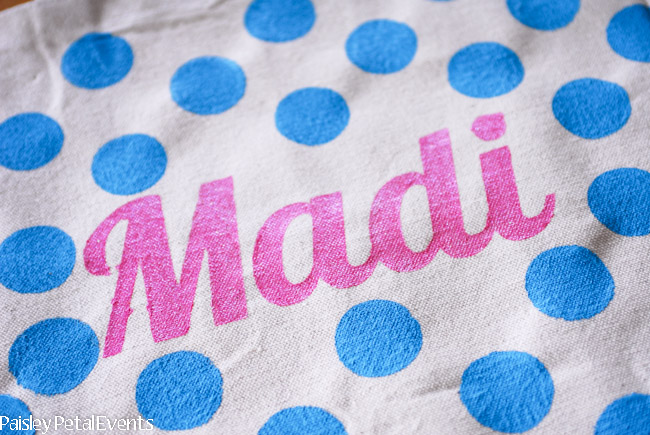
My kids love going to the library to get new books and have some variety in their nightly reading. My 1st grader especially gets bored reading the same books we have in our collection at home, which is actually quite large because I LOVE books, but she does like to have new ones to choose from as well. I thought it would be fun to make a bag for her to carry her pile of books to and from the library in. She had a great time helping me make it and is a great little project for kids to help with!
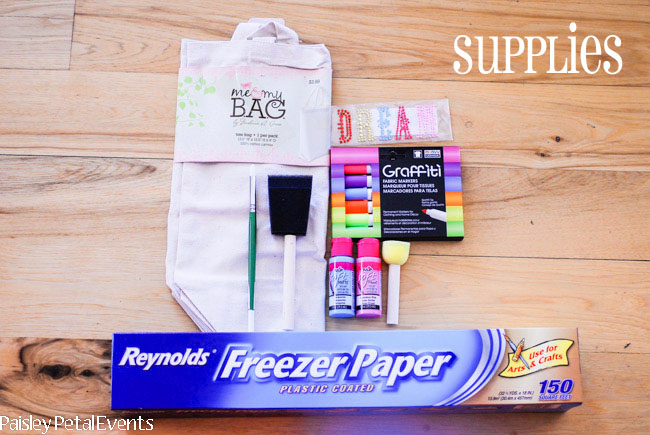
I let her choose the paint colors and she chose pink for the letters of her name and turquoise for the polka dots. Here are the supplies you will need for this project:
- Canvas bag
- Freezer paper
- Fabric paint
- Brush
- Round sponge brush
- Fabric markers & any other embellishments (if you wish)
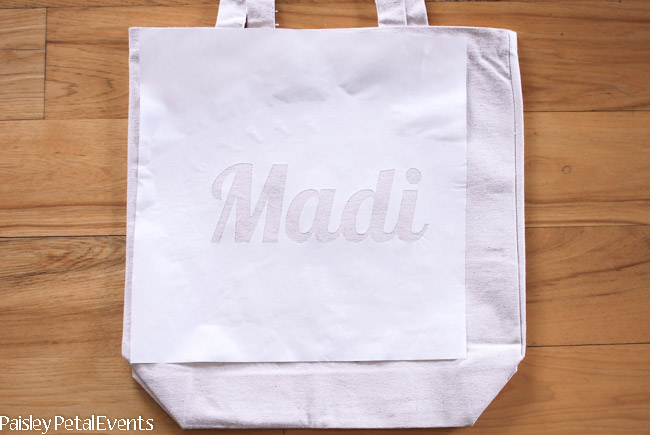
I used my Silhouette machine to cut out the letters of Madi’s name from the freezer paper. I’ve also read that you can print onto the freezer paper and cut out the letters using an xacto knife if you don’t have a Silhouette or Cricut cutting machine. Then you iron the freezer paper onto the bag, shiny side down.

Take your small brush and use the fabric paint to cover the cut out letters of your stencil. I applied 2 coats of paint and Madi was easily able to help with this step.
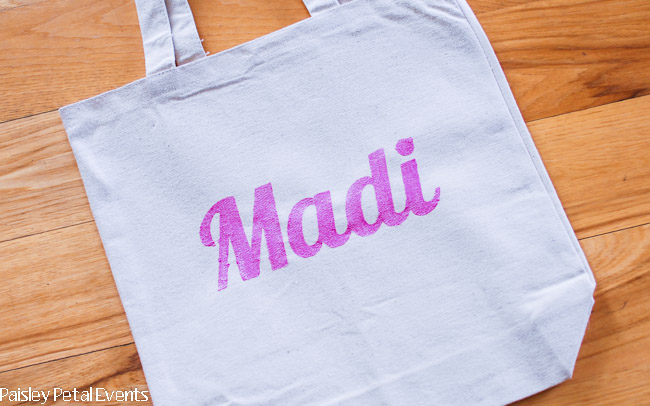
Carefully remove the stencil from your bag and let dry.

Now it’s time to add your polka dots. Use a round sponge brush to apply the dots. I placed the sponge in the correct place and Madi pressed the paint onto the bag.
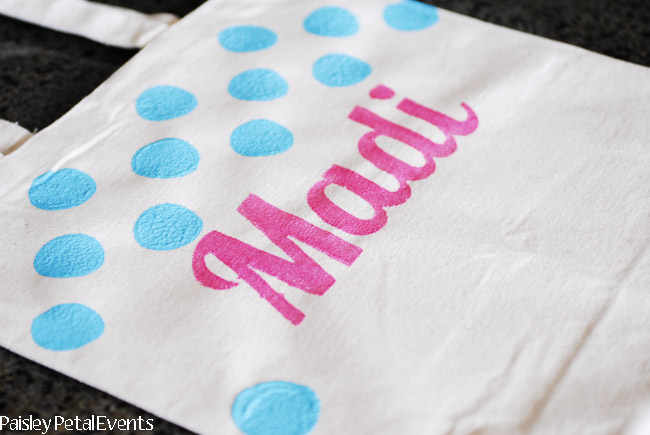
Continue adding your polka dots until the front of your bag is covered and let dry completely.

Once the front was dry, I let Madi decorate the back of the bag however she wanted. I found the rhinestone letters on clearance and then she used fabric markers to draw pictures and write on the bag along with a small round sponge brush to add some dots.

She’s been loving her new bag! (Although the little stinker wouldn’t let me take a picture of her carrying her bag!)

This is a great little craft project for the kids and I love that it’s something useful and won’t just get thrown away in a month!
The post DIY Embellished Book Bag appeared first on Paper Crush.
]]>