I’m loving the tissue tassel trend for party accessories right now – there are so many fun ways to use them and dress up your parties! I finally sat down and made some large ones; they were pretty easy and I got the hang of it after a couple of tries.
Then I thought to myself…boy these sure would be cute in a mini version, wouldn’t they??!!
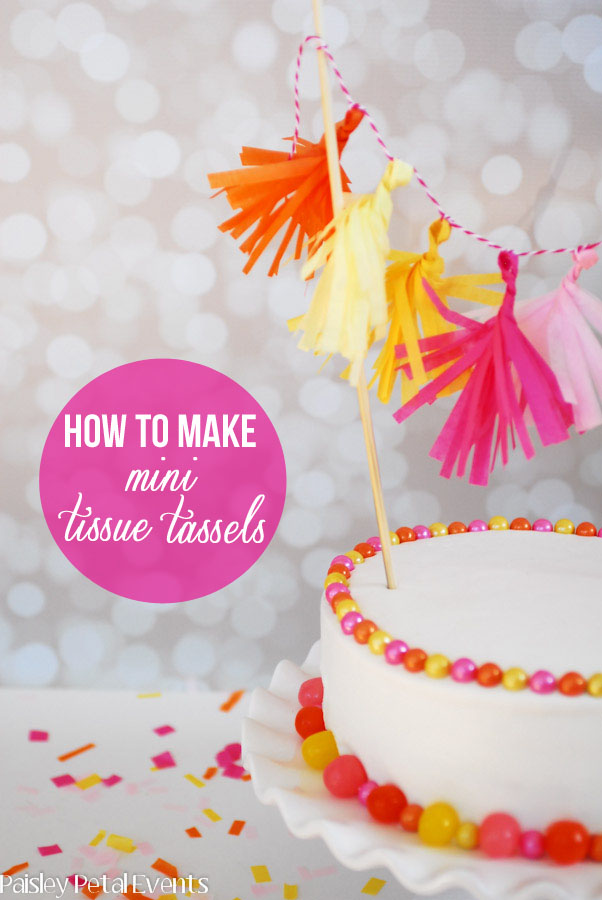
And thus the mini tissue tassels were born. I quickly addded them to some long skewers to easily dress up a simple white cake.
How to Make Mini Tissue Tassels

Supplies:
Tissue paper
Cutting Mat
Rotary Cutter
Straight Edge/Craft Ruler
Twine
One piece of tissue paper will make 4 mini tissue tassels.

1. Start with a piece of tissue paper (mine was 20″ x 20″)
2. Fold the paper in half from top to bottom
3. Fold in half the other way (from left to right)
4. Fold in half again from left to right. You should now have a piece folded tissue paper that measures 5″ wide by 10″ long.

5. With folds on the left and bottom, cut your paper to 4 inches
6. Rotate paper so that folds are at the top and left. Start on the right side and cut 1/4″ sections from the bottom up, leaving approx. 1 inch uncut at the top
7. Cut entire width of paper from right to left in 1/4″ sections

8. Unfold cut paper one time.
9. Cut down the middle of your paper all the way through to the top, giving you two sections.
10. One section will remain folded. Unfold this section and cut down the middle all the way through.
11. Now you will have 4 sections of paper.

12. Unfold one section and open so that fringe is on the outside.
13. Start at the bottom of your section and roll up to the top, untangling fringe as you go, if needed.
14. Once at the top, this is what your tassel will look like.

15. Find the center of your tassel and twist the tassel around the skinny end of a pen to form your loop.
16. Continue twisting
17. Twist tassel around the pen approximately 2-3 times.
18. The finished product.
I know this seems like a lot of steps, but once you do it a couple of times, it will seriously only take you about 5 minutes to make 4 mini garlands.

This poof of pretty mini tissue tassels makes me smile!

The last step to create a garland is to tie your tassels onto a piece of twine or string.

To add to a cake for a sweet topper, simply tie your twine onto 2 bamboo skewers and insert into cake.

To create a similar cake using the colors of your party, I purchased a plain white 8″ cake from Walmart. Then I added pearl sixlets around the top and alternated sixlets with sour balls around the base of the cake. This is a simple and inexpensive cake that anyone can easily make. 

Who’s ready for Spring??? ME!!!
Linking up to these fun parties: SNAP!, Skip to My Lou, Somewhat Simple, Tidy Mom, House of Hepworths, Someday Crafts, Tatertots & Jello
Love these! I’ve seen bigger ones every where but these minis are so cute and perfect for that cake!! great job holly!
Thanks Andrea!! They are so easy and fun!
Oh, I love these and I’m going to have to make some. Thanks for the great tutorial!
Thanks so much Shannon! They’re so easy…have fun!!
Totally adorable … great tutorial! Definitely pinning this : )
Thanks for stopping by Emily! Glad you like them!
Saw this featured at SNAP! and it’s the stinking cutest thing! Adorable.
Pinned and sharing on fb. Just love it!!
Thanks so much for your sweet comments Shannon, and thanks for sharing!! xoxo Holly
love your blog…really cute project! thanks!
Thanks Tisa! I just checked out your cute Etsy shop – those clipboards are darling!!
LOVE the garland….such a great cake. What did you use for the balls? both sizes
Katie
Hi Katie,
Thanks! The large balls are sour balls made by Sweets Candy and the small ones are Sixlets.