This post is sponsored by We R Memory Keepers and HSN but all opinions are my own. It’s no secret that I love planning parties and creating handmade elements to make a celebration extra special. I’m helping with a baby shower next week for a cute girl in my neighborhood who’s having a little boy. […]
The post How to Make a Paper Bowtie Garland appeared first on Paper Crush.
]]>This post is sponsored by We R Memory Keepers and HSN but all opinions are my own.
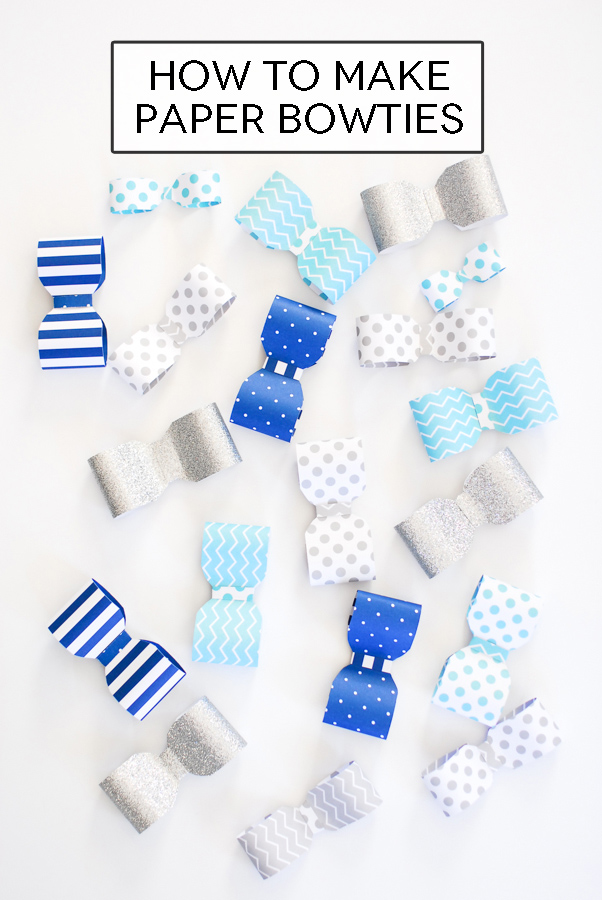
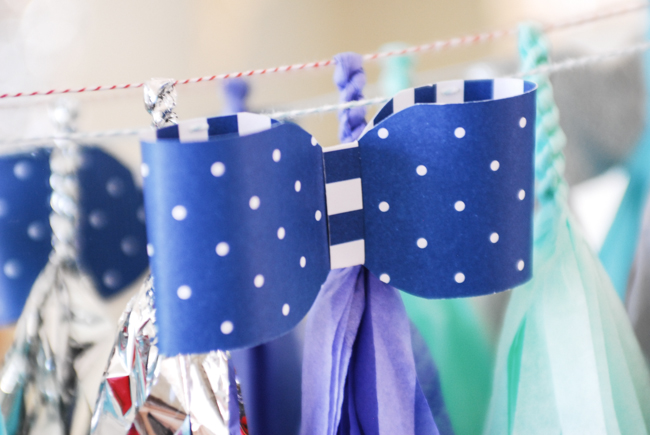
It’s no secret that I love planning parties and creating handmade elements to make a celebration extra special. I’m helping with a baby shower next week for a cute girl in my neighborhood who’s having a little boy. The colors I chose for the shower are the same ones in this fabulous tissue paper tassel garland we sell in the shop: royal blue, aqua, mint gray and silver.
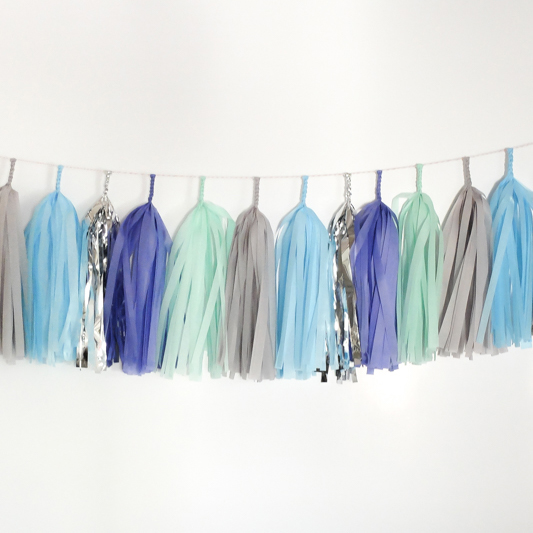
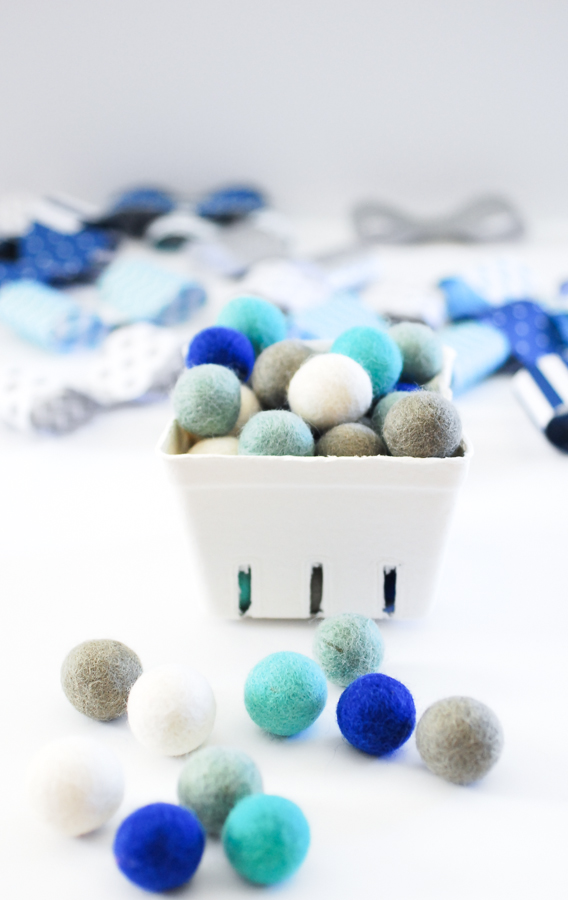
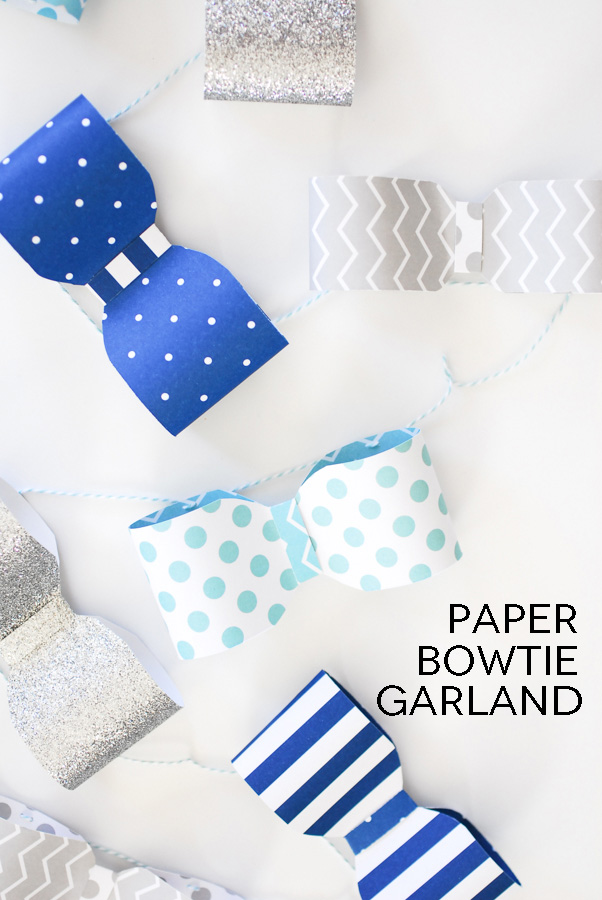
I’ll be using the tissue tassel garland as decor but wanted to add some additional DIY elements as well, including this fun paper bowtie garland in a coordinating color scheme and a colorful felt ball garland as well. You can never have too many garlands in my opinion!
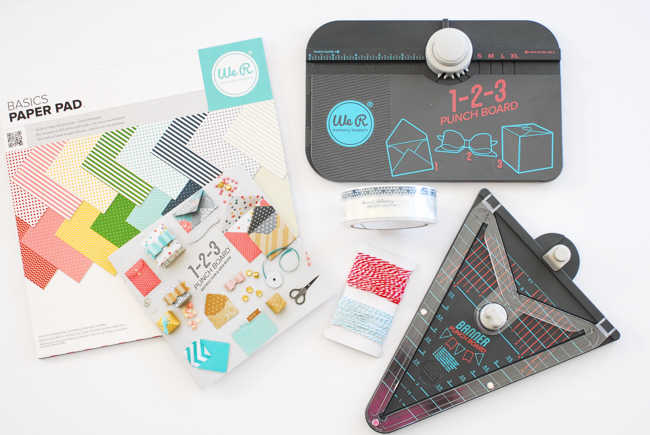
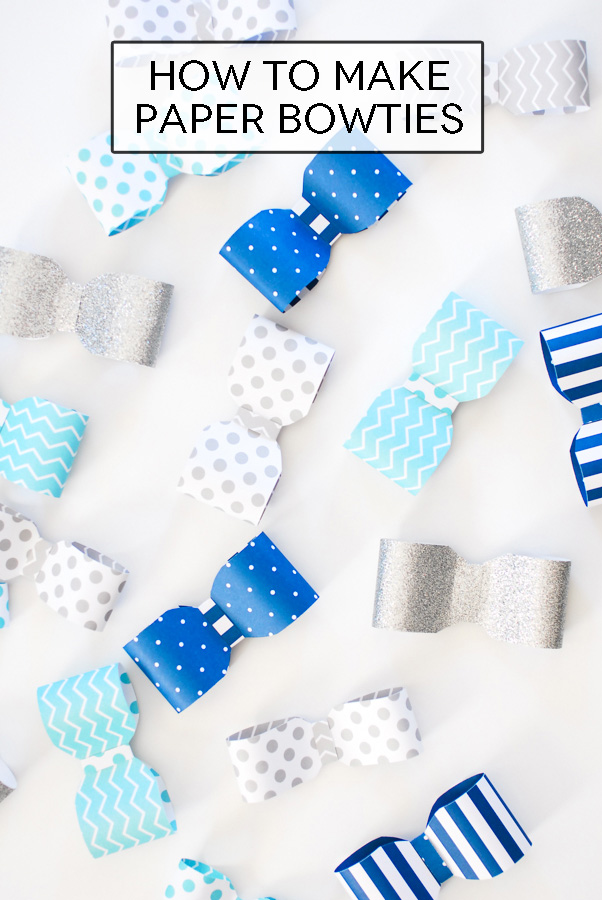
To make my paper bowtie garland I used supplies that came in this fun new punch board party pack from We R Memory Keepers. You guys, this kit is AMAZING! It comes with everything you see above: 123 punch board, banner bunch board, twine, packing tape, 12×12 patterned paper pad and a project idea book. You know how much I love to make bows & banners for parties (as evidenced here and here and here) and this kit will make those things PLUS envelopes, envelope liners and boxes – so fun!!

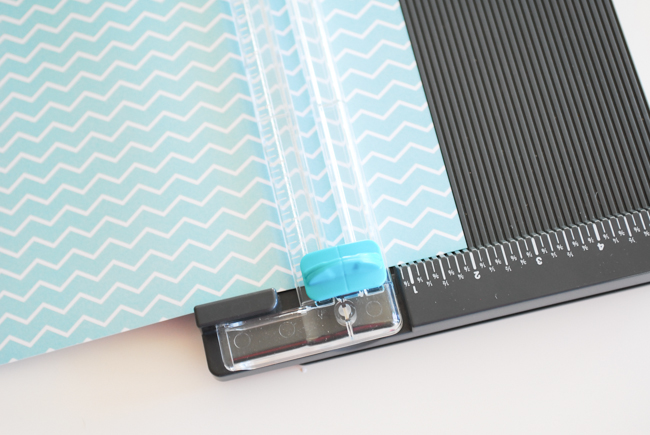
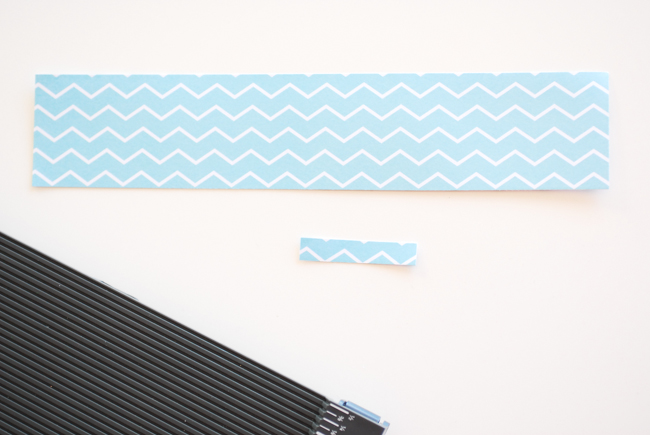
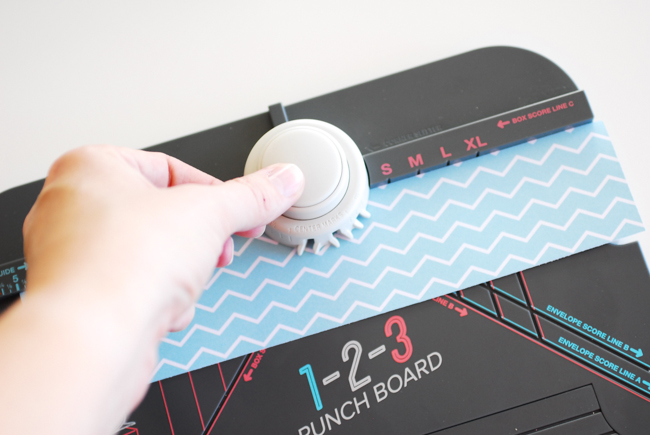
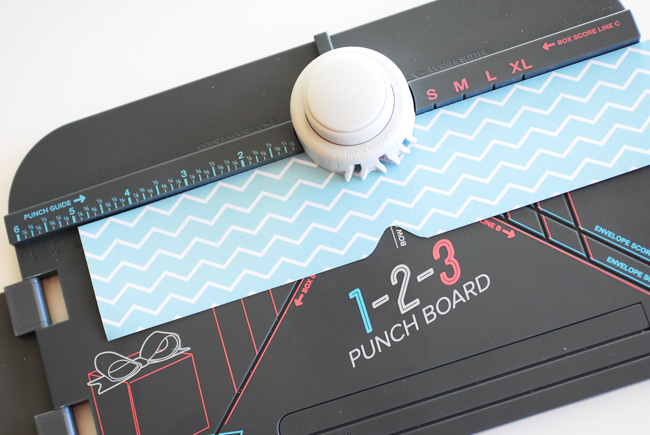
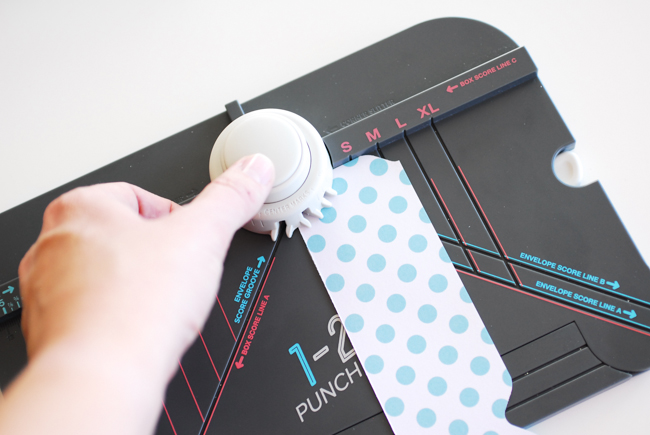
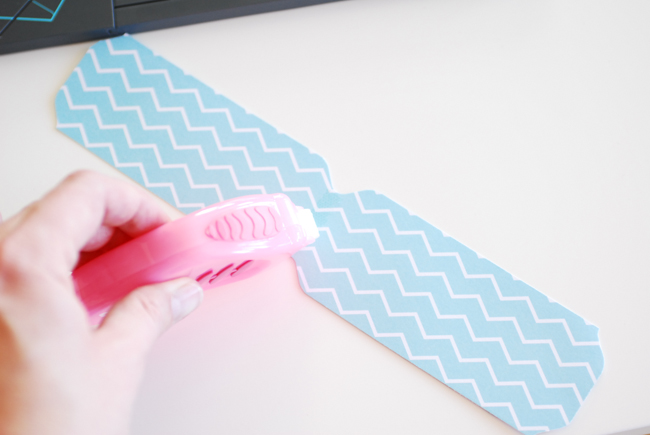
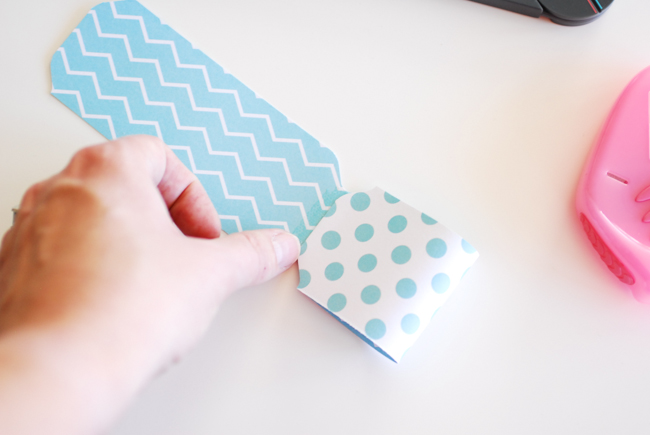
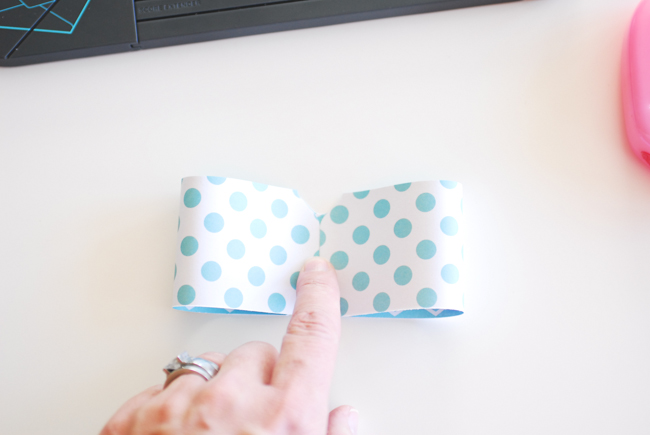
And here are the specific supplies I used for my paper bowtie garland: paper trimmer, 123 punch board, 12×12 paper, twine, adhesive and a small 2 hole punch. All instructions for making 6 different sizes of bows are included and they were very easy to make. The instructions tell you how to make a more fancy bow, but since I’m making bowties I eliminated 1 piece of paper and 1 step in the process. The basic steps are shown below.


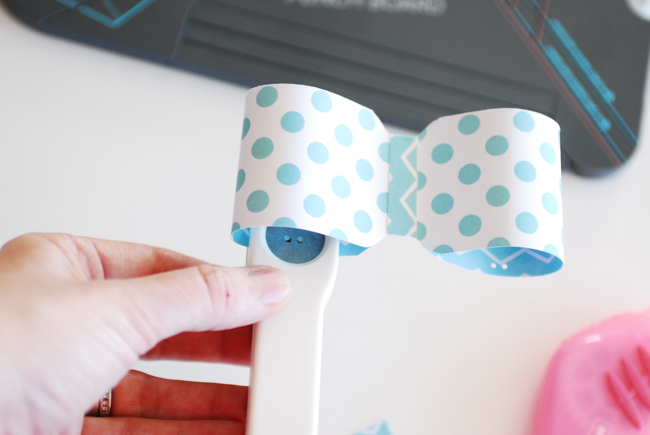
Here’s where I used my little 2 hold punch to create holes for my twine to string through.
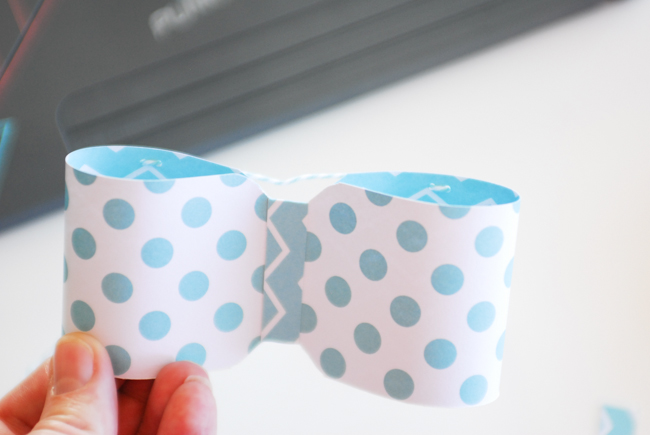
And here’s my twine strung through the holes on my bow. Just keep making bows and stringing them onto the twine to create the length you need.

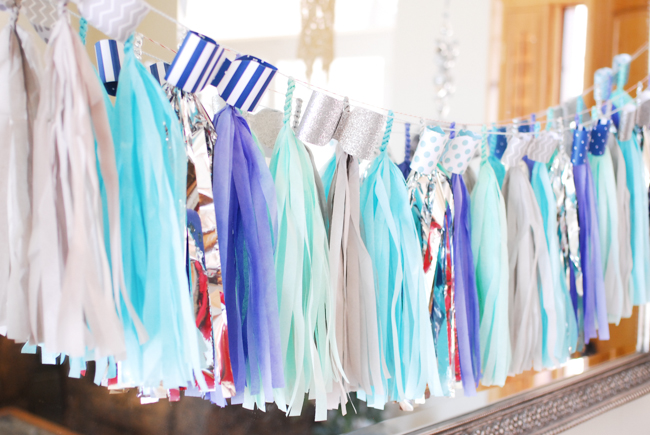
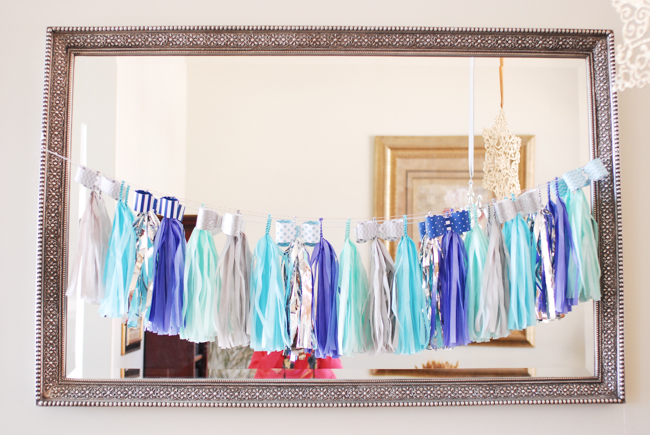
I hung my tissue paper tassel garland over my mirror in my entryway and added the bowtie garland and felt ball garlands on top of it. But they’ll all be coming to the baby shower with me next week!

The awesome We R Memory Keepers 123 Punch Board Party Kit is available to buy exclusively on HSN next Tuesday March 24th so set your alarms and head on over there Tuesday! The kit is a one time special and will be discounted below retail pricing.
I can’t wait to make the banners, envelopes & boxes with my punchboards next!
The post How to Make a Paper Bowtie Garland appeared first on Paper Crush.
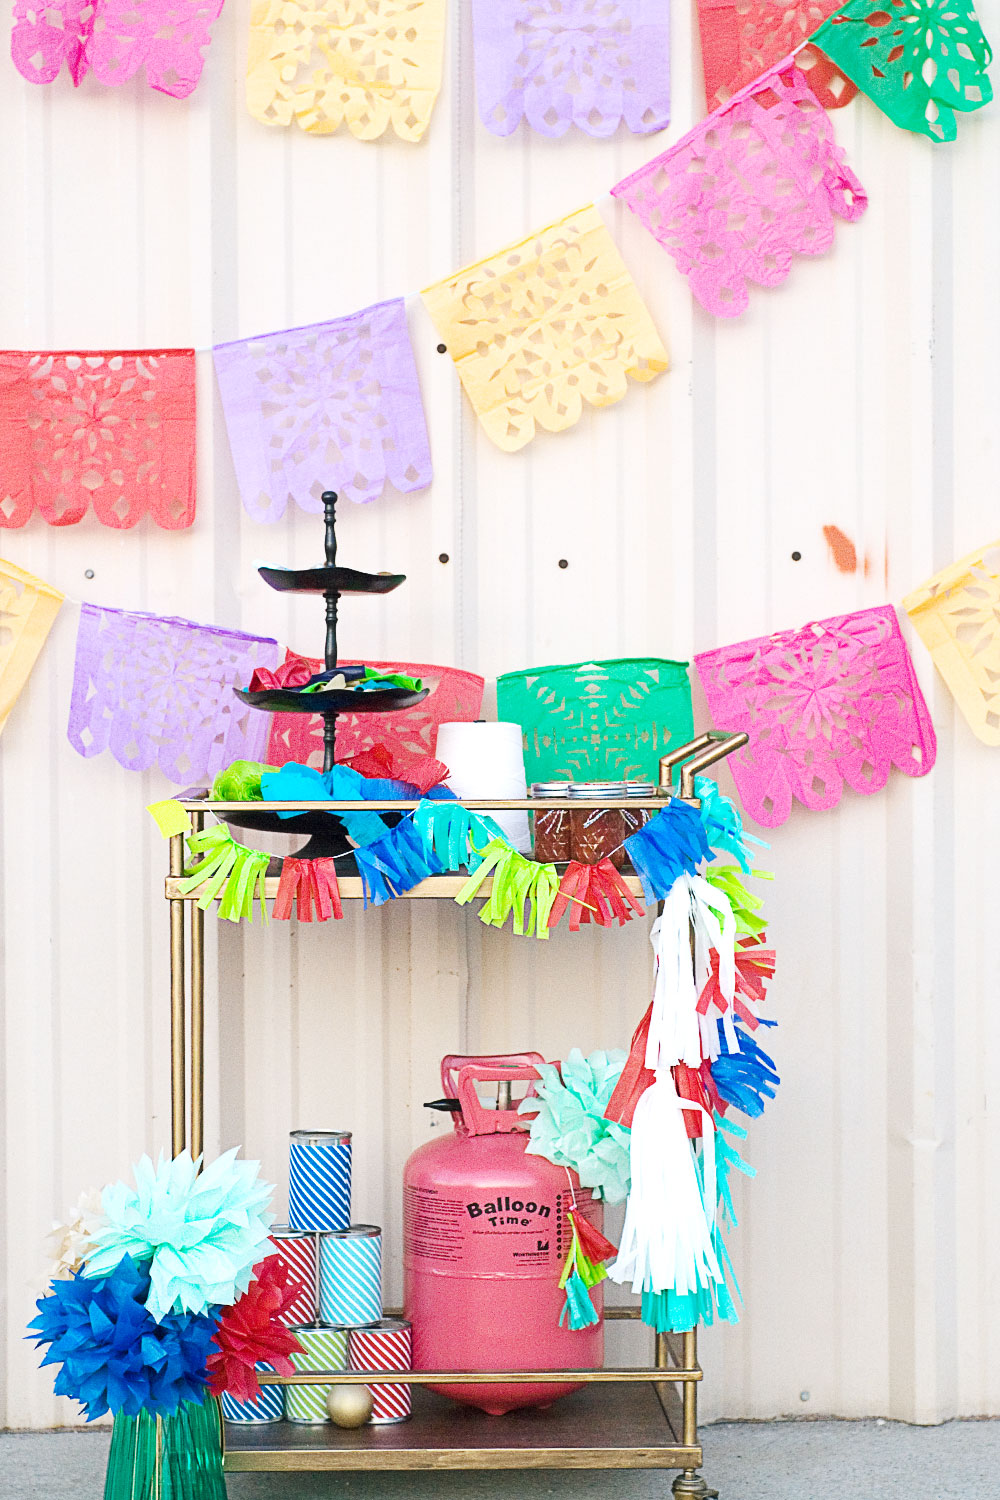
]]>Well, it’s Friday and the last day of our fun Summer Fiesta Party Hop. I really hope you’ve enjoyed the fabulous ideas that have been shared this week so we’ll leave you with 2 final projects – tissue paper flowers and fun games for your party. Here’s how to make the tissue paper flowers: You […]
The post The Party Hop – Summer Fiesta – Tissue Paper Flowers Tutorial & Games appeared first on Paper Crush.
]]>Well, it’s Friday and the last day of our fun Summer Fiesta Party Hop. I really hope you’ve enjoyed the fabulous ideas that have been shared this week so we’ll leave you with 2 final projects – tissue paper flowers and fun games for your party.
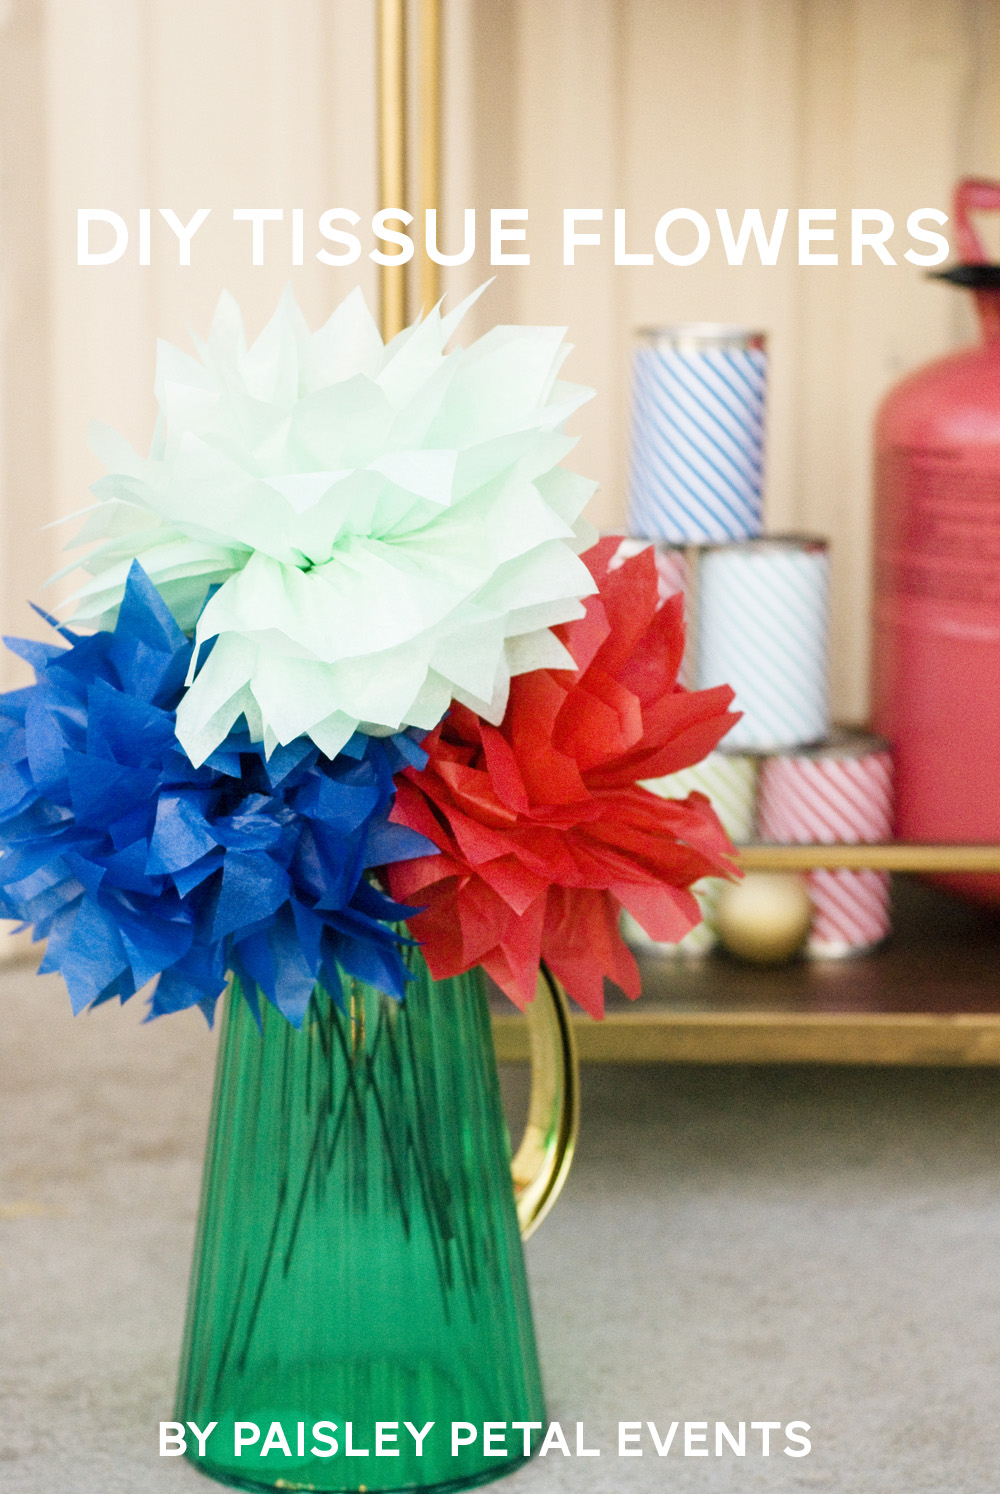
Here’s how to make the tissue paper flowers:
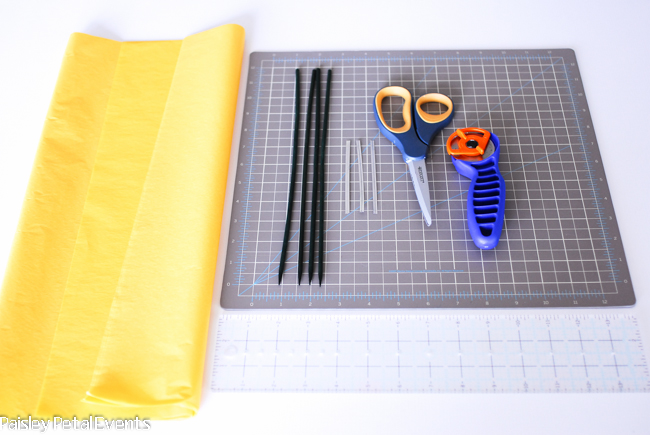
You will need:
- 4 pieces of tissue paper (makes 2 flowers)
- Scissors
- Twist tie
- Cutting mat (not needed, but helpful)
- Ruler (not needed, but helpful)
- Plant stakes or wood dowels
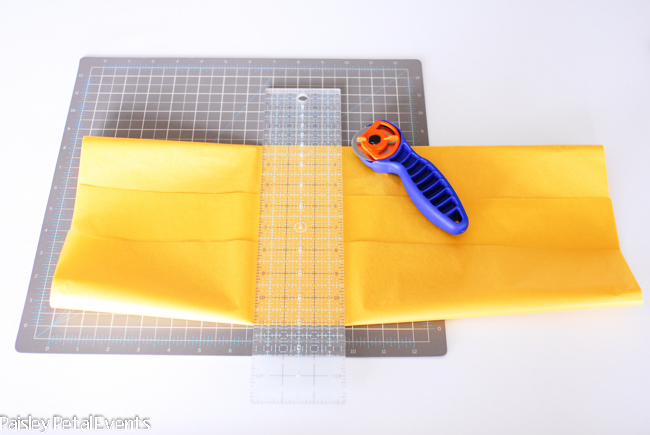
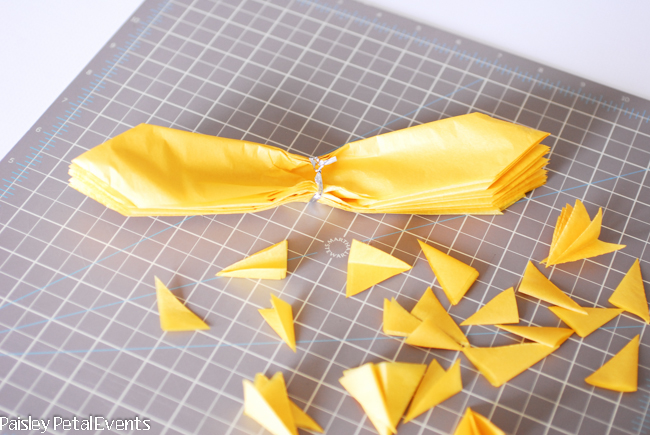
First cut your tissue paper in half across the width of your paper so you can make 2 small flowers.
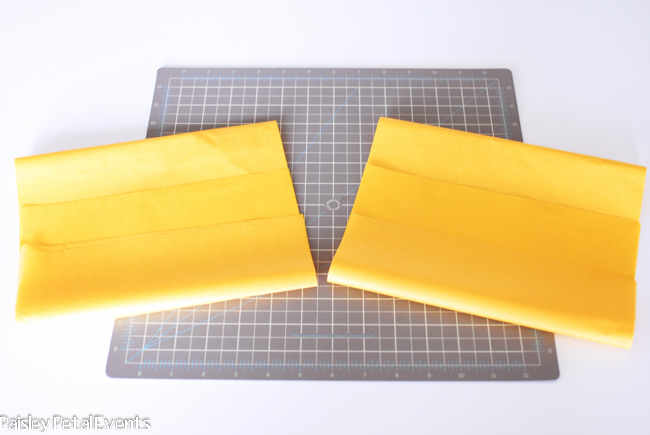
Next, fold your tissue paper in approximately 1″ folds the entire length of your tissue paper.

Use your twist tie to secure the center of your folded tissue paper.
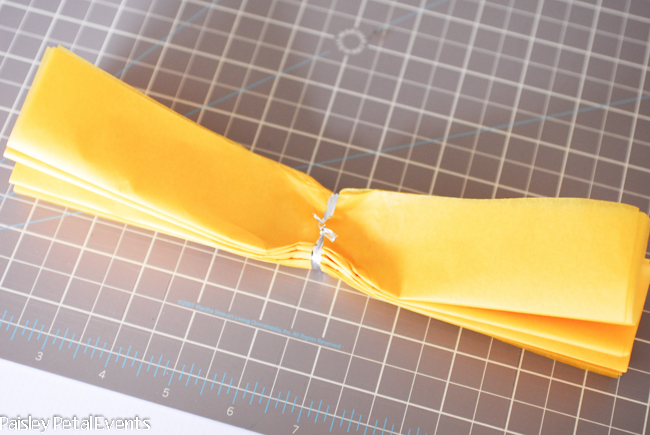
Cut the ends of your paper into a point. You could also make a rounded tip for a different look.
Carefully pull your tissue paper layers up toward the center one layer at a time. Be gentle with the paper, as it does tear easily. The good thing is that if it tears, you won’t really see it anyway once it’s all fluffed out!
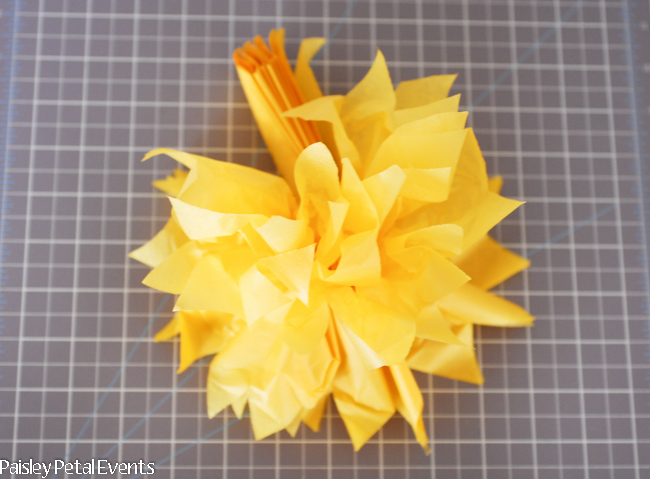
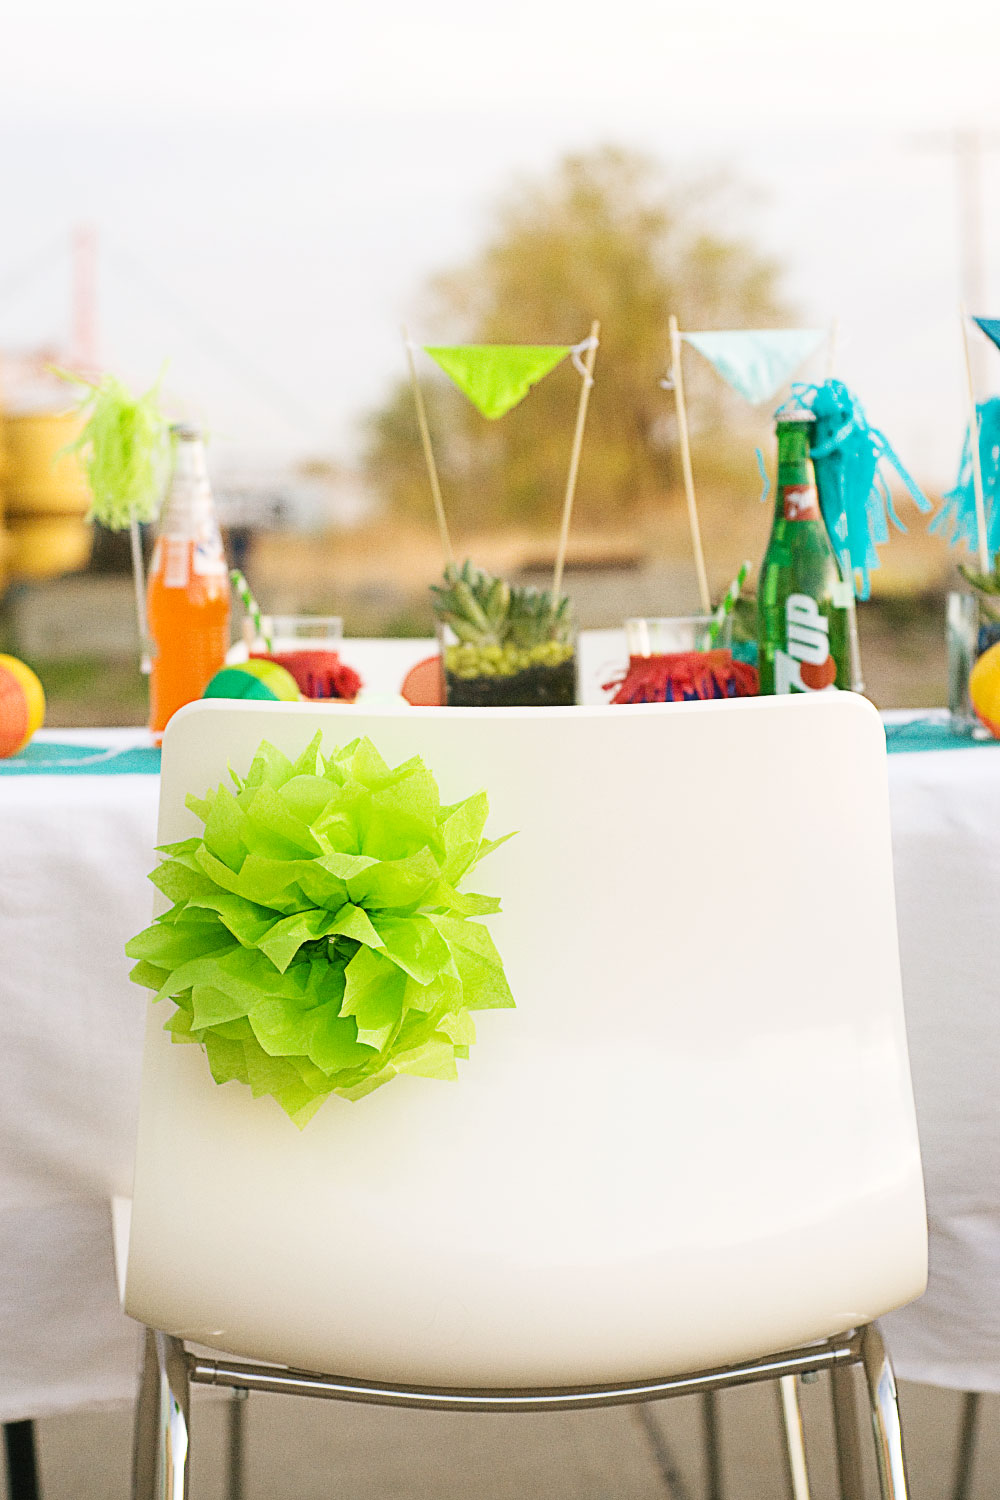
Fluff both sides of the flower if you want a full flower to use as a centerpiece. Or only fluff one side if you want it to lay flat, like we did as chair back decoration for the Summer Fiesta.

Add a stem to your flower by inserting your stick or dowel into the center of your flower.
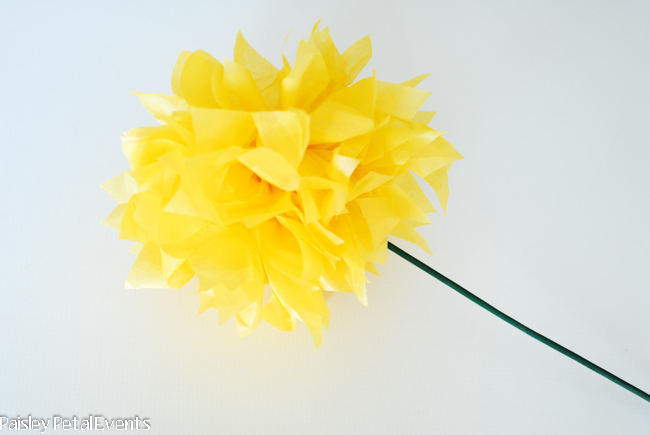
Make a bunch to use as a table centerpiece or place them on chair backs for party decor!
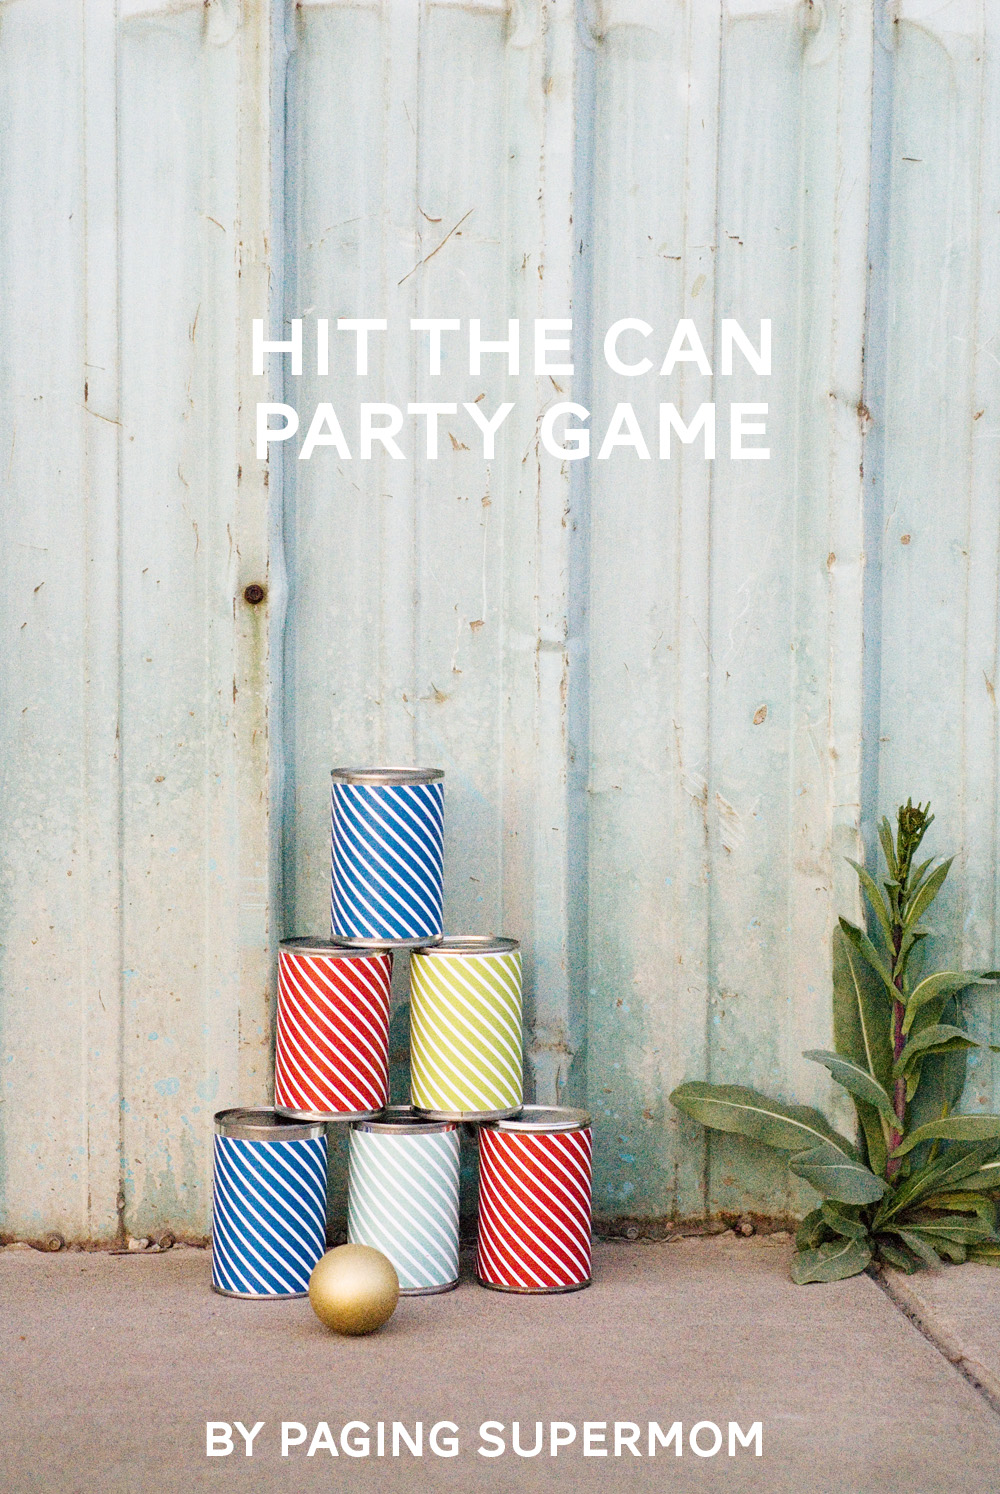
Paging Supermom shows you how to make a Hit the Can game to provide your guests with a fun Summer Fiesta party activity.
Thanks so much everyone for following along our Summer Fiesta party hop – I hope you are inspired to host your own backyard fiesta using some of the wonderful ideas that have been shared this week!
A special thanks again to our sponsor, Balloon Time. We’d love for you to follow Balloon Time here: Twitter, Facebook, Pinterest for more fun party ideas!
The post The Party Hop – Summer Fiesta – Tissue Paper Flowers Tutorial & Games appeared first on Paper Crush.
]]>Yesterday I shared my son’s blue & aqua baptism brunch, and today I thought I’d show you how I made the little necktie bunting I used on the donut cake. In case you haven’t noticed I kind-of have a thing for little buntings on cakes, as evidenced by this rainbow cake with a Happy Birthday […]
The post Necktie Bunting Tutorial appeared first on Paper Crush.
]]>
Yesterday I shared my son’s blue & aqua baptism brunch, and today I thought I’d show you how I made the little necktie bunting I used on the donut cake. In case you haven’t noticed I kind-of have a thing for little buntings on cakes, as evidenced by this rainbow cake with a Happy Birthday bunting, this simple washi tape bunting, and then this cute mini tissue tassel bunting. I like buntings because they’re usually pretty quick to make and they just add so much to a simple store-bought cake (or donut cake).


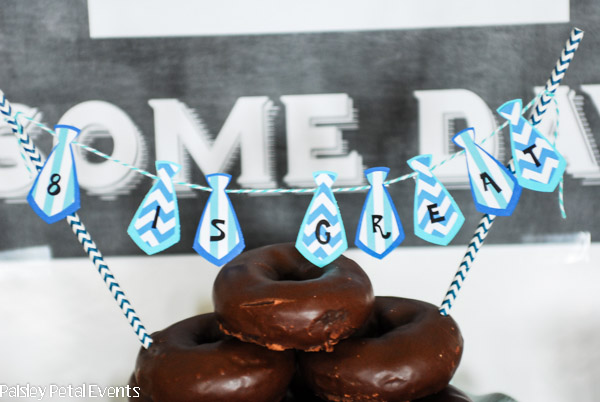
Logan loves chocolate donuts so I knew we’d be having a donut cake at our baptism brunch. I just embellished it with a mini necktie bunting, to dress it up a bit. You could use this for a little man birthday party or any boy themed party, really.

You only need a couple of things to create this banner: patterned paper, plain cardstock, straws (or bamboo skewers), twine and small letter stickers.

First I cut mini neckties out of colored cardstock about 2 1/4 inches long by 1 1/4 inches wide using my Silhouette machine. Then I cut out the smaller, patterned ties, which were about 2″ long by 1 inch wide. I used a glue stick to attached the 2 pieces together. If you don’t have a cutting machine, simply create a mini tie pattern and trace as many as you need for your bunting.

Use your stickers to spell out the saying for your bunting. Attach the neckties to your twine with tiny pieces of tape on the back. Tie the twine to your straws (or bamboo skewers) and insert into your cake or whatever else you want to embellish!

You’re done! A simple and easy way to dress up any cake or dessert for your next celebration!
So what about you?? Do you ever use little buntings or something similar to dress up store-bought items?? I’d love to hear in the comments below!
The post Necktie Bunting Tutorial appeared first on Paper Crush.
]]>Today I wanted to share how to make these cute DIY decorative paper medallions, which can be used for almost any occasion! The decorative edge on these medallions make them a little more feminine, but if you don’t want a feminine look, simply leave your edge straight. I like to make a bunch of them […]
The post How to Make Decorative Paper Medallions appeared first on Paper Crush.
]]>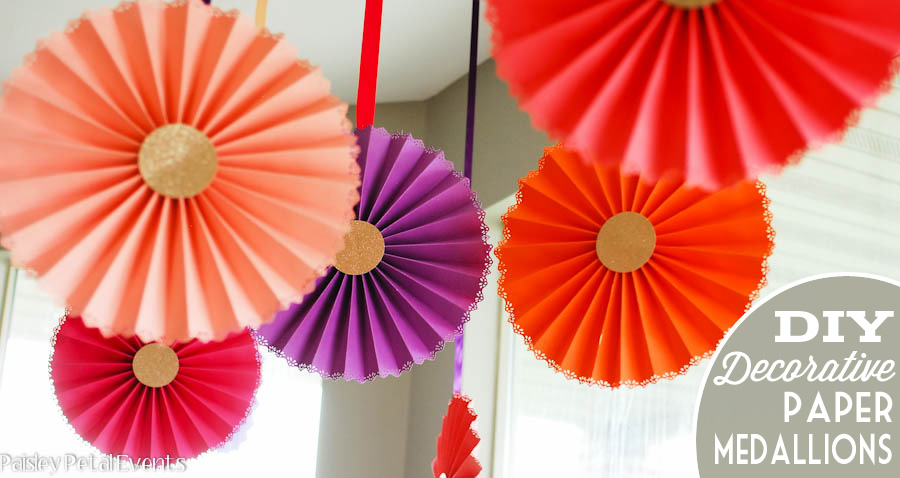
Today I wanted to share how to make these cute DIY decorative paper medallions, which can be used for almost any occasion! The decorative edge on these medallions make them a little more feminine, but if you don’t want a feminine look, simply leave your edge straight. I like to make a bunch of them to hang over a dessert or food table, in front of windows in your party area, or hang them from a chandelier for decor. Really any place you can find to use them in your party space will make it a little more festive and fun!
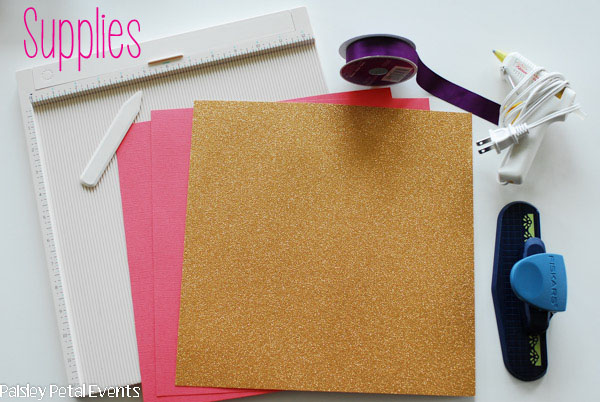
Supplies
2 pieces of 12×12 cardstock per medallion
Decorative edge paper punch (optional)
Ribbon
Coordinating paper (for center circle)
Glue gun
Scoring board (optional)
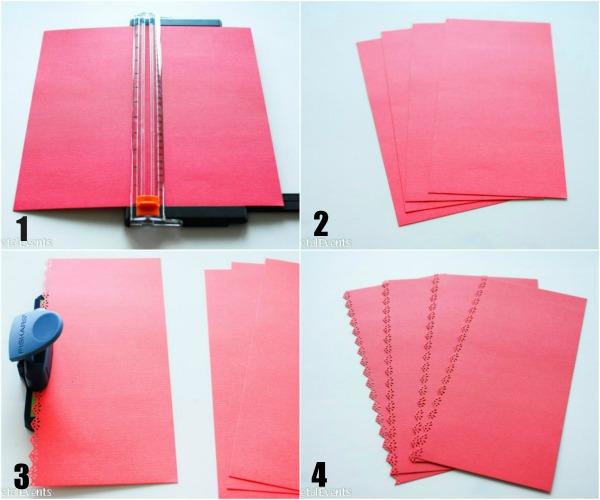
Instructions
1. Cut each piece of your 12×12 cardstock in half
2. To make 4 pieces of 6×12 paper
3. Punch the 12″ edge of each piece of paper with your decorative punch
4. 4 pieces of decorated 6×12 paper

5. Score each piece of 6×12 paper at 1 inch increments. Decorative edge will be at the bottom.
6. Fold your paper accordion style along scored lines. If you don’t have a scorer, simply fold your paper, accordion style, every 1 inch.
7. Fold all 4 pieces of paper in the same manner.
8. Hot glue all 4 folded pieces together, end to end.
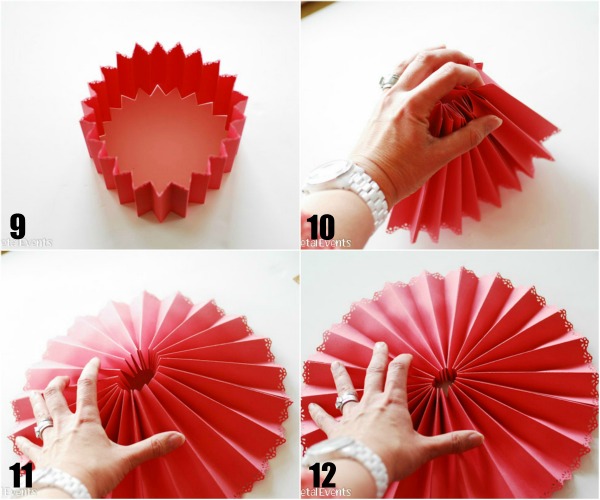
9. Glue 2 ends of paper chain together to form a circle.
10. Gather the circle together in the center.
11. Press down on center of circle
12. Until medallion is flat on your work surface.
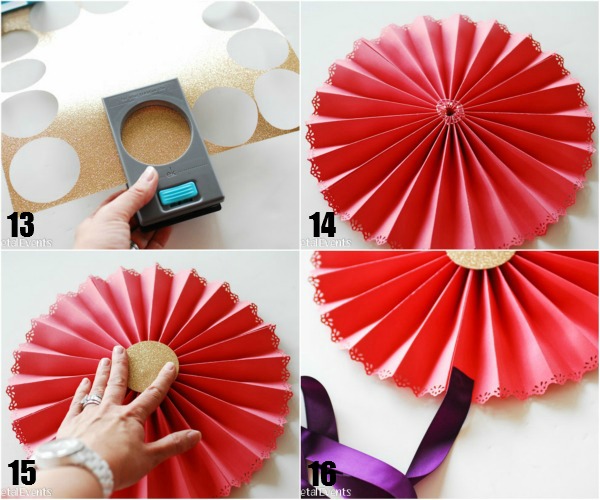
13. Punch (or cut) 2″ circle for the center of your fan.
14. Put a generous amount of hot glue in the center of your medallion to hold it together.
15. Place 2″ circle on hot glue.
16. Hot glue ribbon onto your medallion and hang!

Using the 12×12 cardstock will make your medallions approximately 12 inches across. If you would like smaller or larger medallions, cut the width of your paper accordingly.
I’ve found that white thumbtacks work best (better than tape) to hang from the ceiling. Tape is going to work better on windows or other smooth surfaces.
Now go make some fun hanging paper medallions for that upcoming event! 
The post How to Make Decorative Paper Medallions appeared first on Paper Crush.
]]>I wanted to add some new ornaments to my gold Christmas tree this year and when I was sent a box of fun Recollections glitter from Michaels stores, I started thinking about what I could make to give my tree some new life. I came up with these DIY glitter pinecone ornaments and I LOVE […]
The post Glitter Pinecone Ornaments appeared first on Paper Crush.
]]>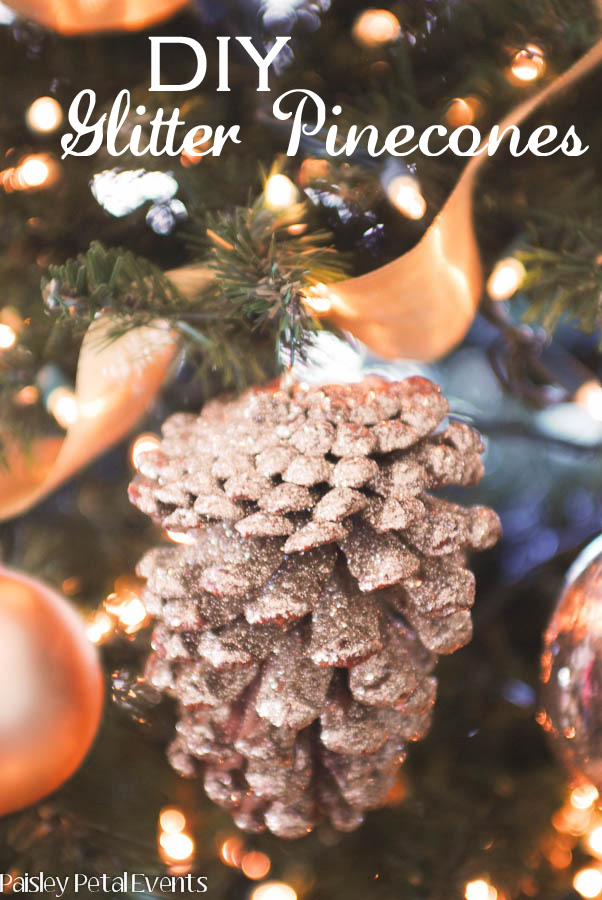
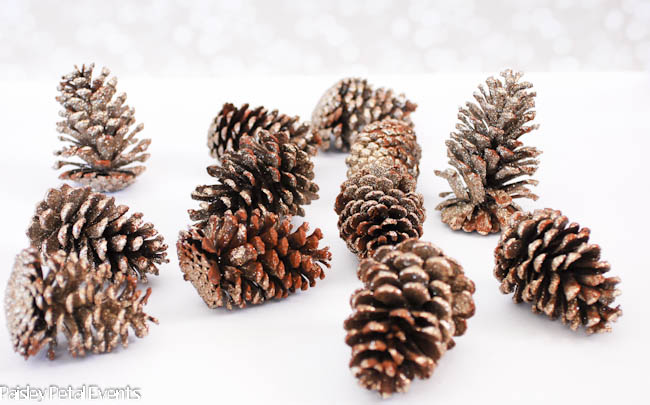
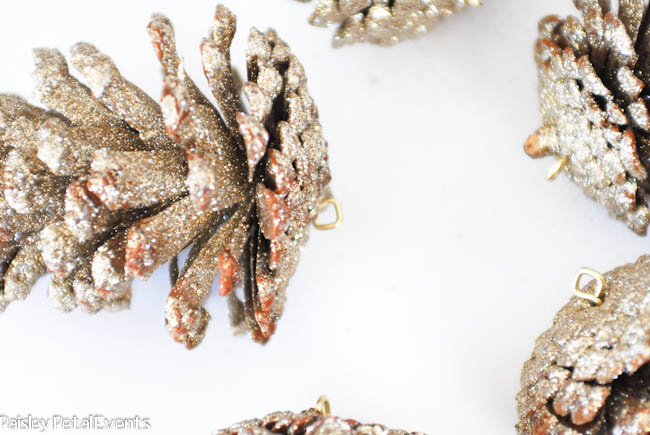
I wanted to add some new ornaments to my gold Christmas tree this year and when I was sent a box of fun Recollections glitter from Michaels stores, I started thinking about what I could make to give my tree some new life. I came up with these DIY glitter pinecone ornaments and I LOVE how they turned out!
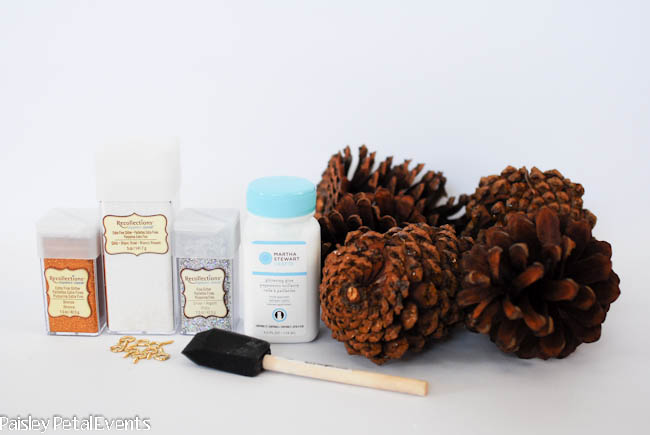
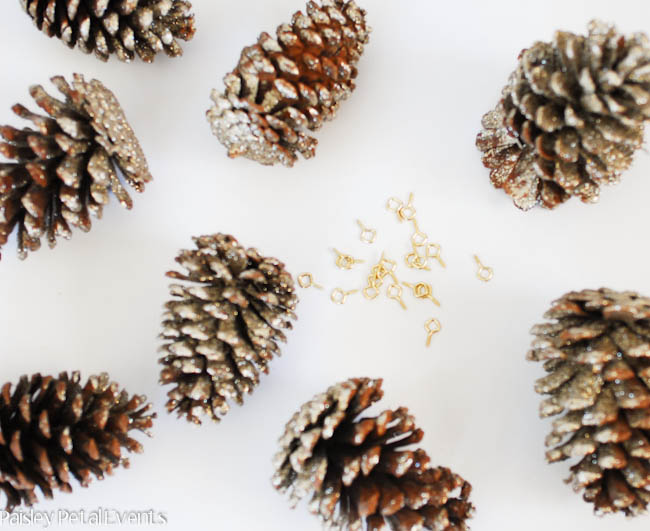
To make these glitter pinecone ornaments you will need large pinecones, glue (or mod podge), a small brush, glitter and 1/2″ screw eyes. I found my large pinecones at Walmart.
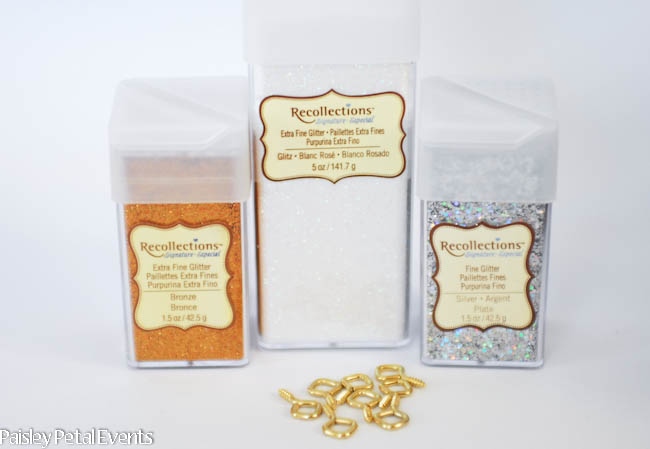
Recollections glitter is found exclusively at Michaels craft stores starting at $3.99 a bottle. They sell it individually or in packages, as well as different colors and textures such extra fine, chunky and tinsel. I located the 1/2″ brass screw eyes at Home Depot in a picture hanging kit.

First, apply the glue to your pinecones using a small brush to reach in between all layers of the pine cone.
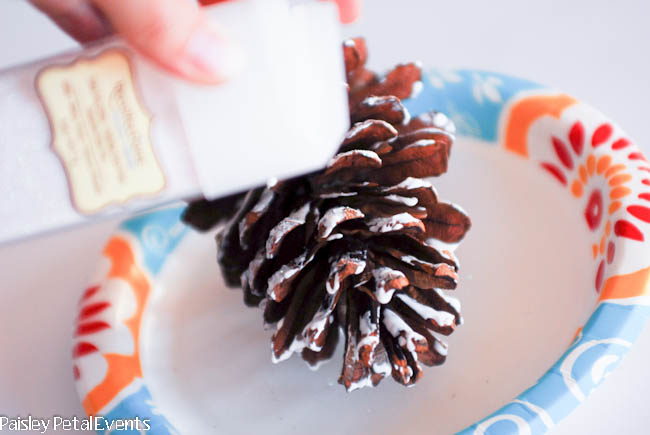
Next, generously sprinkle glitter all over your pinecone to cover all glue areas.
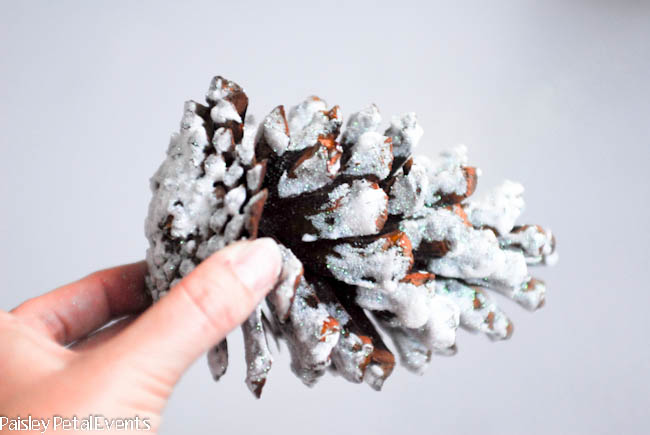
Here’s the pine cone right after the glitter was applied but before the glue had dried.

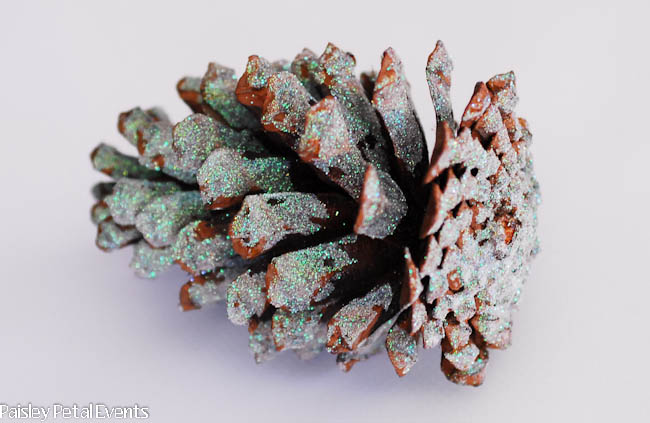
I used a white iridescent glitter on this pine cone and it turned out very pretty once the glue had dried, but I didn’t love it with the rest of my tree decor so I used gold glitter for the other pine cones I made.

Once your pinecones have dried complete, simply push & twist the screw eye into the top of your pine cone, attach an ornament hanger and hang on your tree!

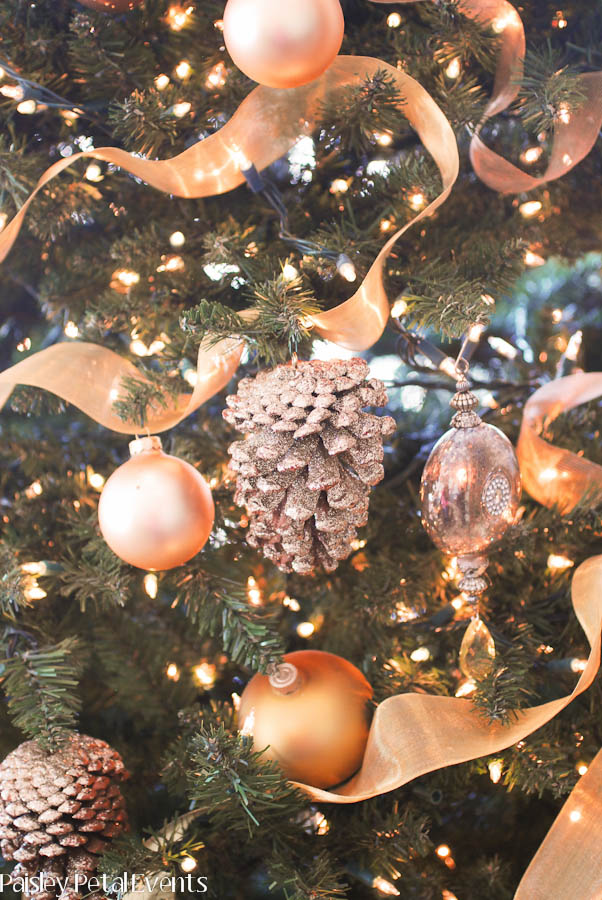
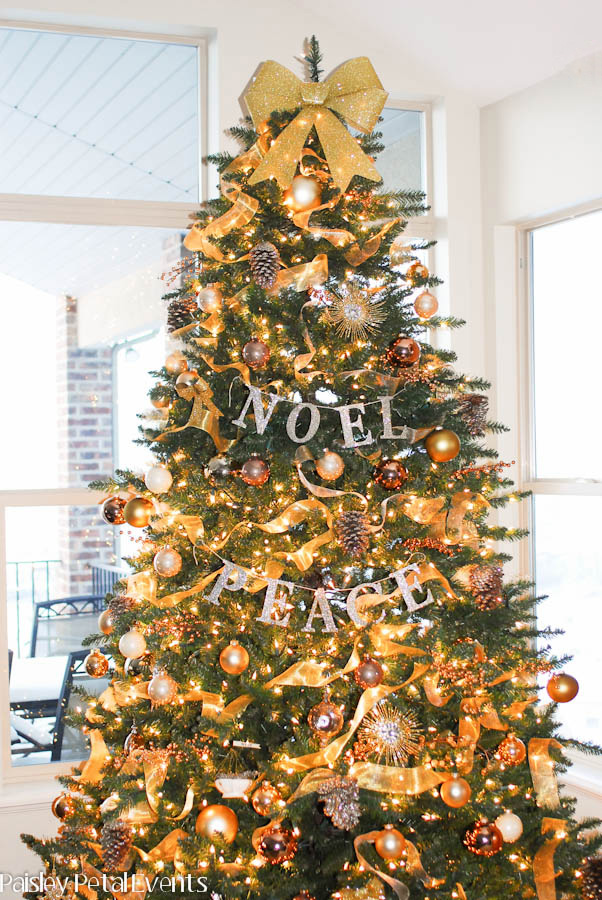
Here’s my gold Christmas tree with my new glitter pinecone ornaments along with a few other additions – the glittered letters are new too! Glitter can be used for so many fun projects, don’t you think?! The tutorial for making those is coming soon.
***I was provided product and compensation in exchange for this post, but all opinions are completely my own.
The post Glitter Pinecone Ornaments appeared first on Paper Crush.
]]>I’m so excited to be a part of a fun idea that Sara from Confetti Sunshine put together – it’s called a Party Hop where a group of creative, party-loving bloggers all contribute their great ideas and make one big giant party! This time around the theme was “A Handmade Holiday” so everyone has created […]
The post A Handmade Holiday : DIY Holiday Banner and Gift Wrapping Ideas appeared first on Paper Crush.
]]>
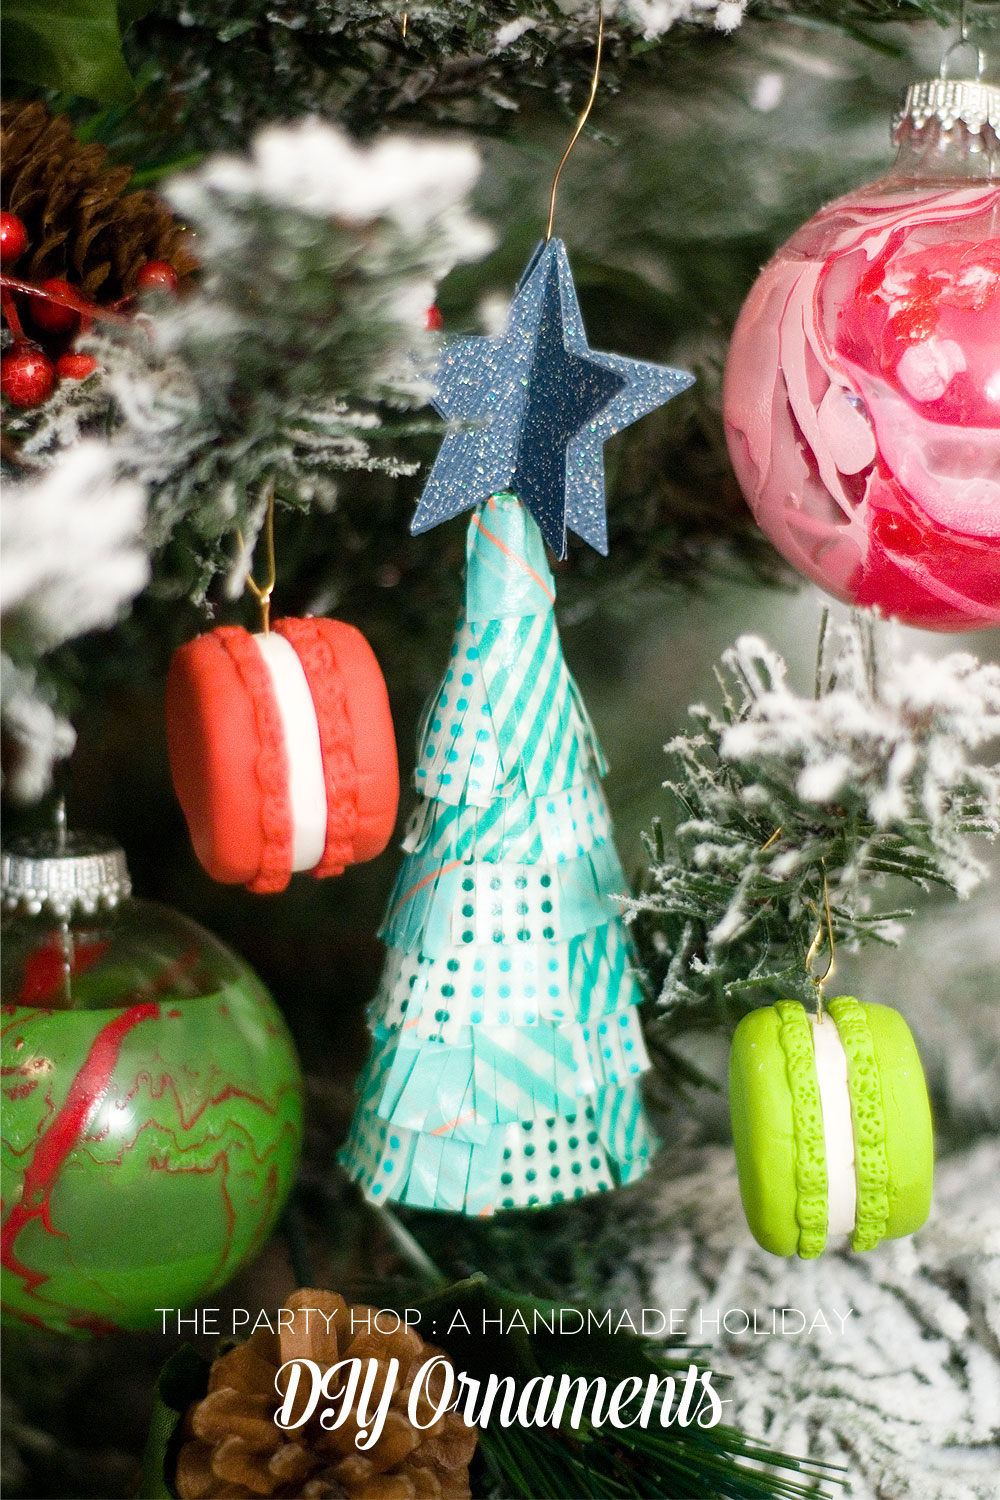
I’m so excited to be a part of a fun idea that Sara from Confetti Sunshine put together – it’s called a Party Hop where a group of creative, party-loving bloggers all contribute their great ideas and make one big giant party! This time around the theme was “A Handmade Holiday” so everyone has created DIY projects to give those holiday projects, parties and ideas a personal touch.
Today I’ll be sharing my contribution – a DIY Holiday Banner that you can use for Christmas decor or for a holiday party as well! Today’s other wonderful creations include DIY gift wrapping ideas so be sure to visit the other blogs to see the step by step instructions on their gift wrapping ideas.
Check back every day this week to see all of the other fabulous creations in our Handmade Holiday blog hop!

Banners are a favorite decor item of mine! They can be used for party decor as well as everyday decor – you just change them out depending on the season! A printable banner is a quick and easy way to add a little flair to your decor, but recently I’ve been adding a little extra color and weight to my banners with colored cardstock. It really makes your banner stand out even more.

To make the banner you will need:
1. Printable “Happy Holidays” banner
2. 12″x12″ colored cardstock to match your decor
3. Paper trimmer
4. Scissors
5. Glue stick
6. Hole punch
7. Ribbon


First you need to print and cut out your Happy Holidays banner. I like to print mine at Office Depot and I bring my own heavy weight white cardstock to save money – they always do a fabulous job!

Step 1: Cut off 4 inches from 1 side of your 12×12 cardstock to make the paper 8×12.
Step 2: Cut the 8″x12″ paper in half to make 2 rectangles that are 6″x8″.
Step 3: Apply glue to back of printed banner piece.
Step 4: Center banner piece and adhere to cardstock.

Step 5: Cut your colored cardstock to match the banner shape by cutting from bottom left to center.
Step 6: Do the same on the right side – cut from the bottom right to center leaving same width of cardstock on each side of banner.
Step 7: Punch holes on top of cardstock approximately 1 inch from each side.
Step 8: Thread ribbon through the holes on each banner piece and hang!
Depending on the surface you’re hanging the banner from, I like to use either clear command hooks or even clear packing tape holds well.
Here are the sneak peeks at the DIY gift wrapping ideas being shared today. Be sure to visit their blogs for all the details!

DIY Watercolor Gift Wrap from Lulu the Baker

DIY Ornament Gift Tags by The Elephant of Surprise

DIY Egg Carton Gift Wrap by My Paper Pinwheel
Be sure to come back tomorrow for some fabulous DIY ornaments!
The post A Handmade Holiday : DIY Holiday Banner and Gift Wrapping Ideas appeared first on Paper Crush.
]]>I’m loving the tissue tassel trend for party accessories right now – there are so many fun ways to use them and dress up your parties! I finally sat down and made some large ones; they were pretty easy and I got the hang of it after a couple of tries. Then I thought to […]
The post How to Make Mini Tissue Tassels appeared first on Paper Crush.
]]>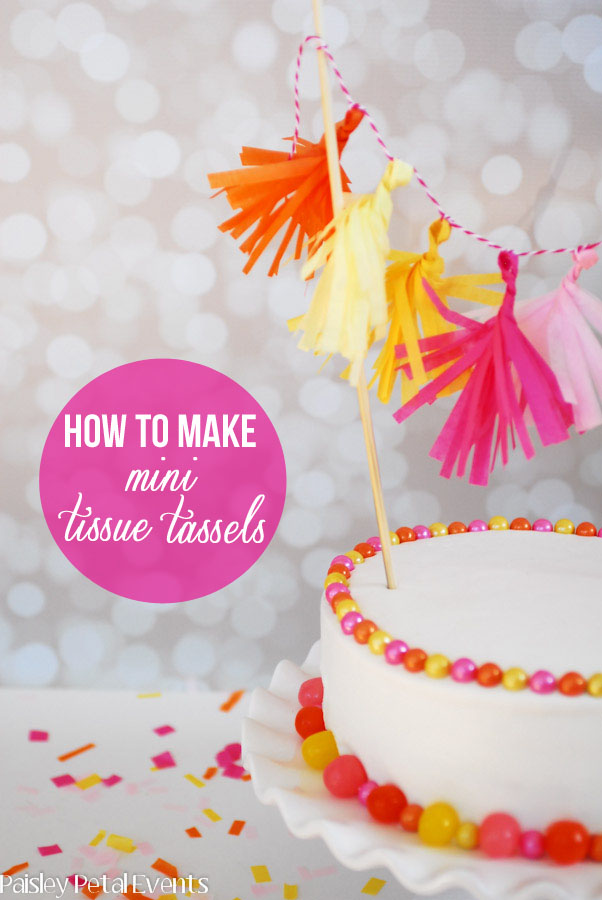
I’m loving the tissue tassel trend for party accessories right now – there are so many fun ways to use them and dress up your parties! I finally sat down and made some large ones; they were pretty easy and I got the hang of it after a couple of tries.
Then I thought to myself…boy these sure would be cute in a mini version, wouldn’t they??!!
And thus the mini tissue tassels were born. I quickly addded them to some long skewers to easily dress up a simple white cake.
How to Make Mini Tissue Tassels

Supplies:
Tissue paper
Cutting Mat
Rotary Cutter
Straight Edge/Craft Ruler
Twine
One piece of tissue paper will make 4 mini tissue tassels.

1. Start with a piece of tissue paper (mine was 20″ x 20″)
2. Fold the paper in half from top to bottom
3. Fold in half the other way (from left to right)
4. Fold in half again from left to right. You should now have a piece folded tissue paper that measures 5″ wide by 10″ long.

5. With folds on the left and bottom, cut your paper to 4 inches
6. Rotate paper so that folds are at the top and left. Start on the right side and cut 1/4″ sections from the bottom up, leaving approx. 1 inch uncut at the top
7. Cut entire width of paper from right to left in 1/4″ sections

8. Unfold cut paper one time.
9. Cut down the middle of your paper all the way through to the top, giving you two sections.
10. One section will remain folded. Unfold this section and cut down the middle all the way through.
11. Now you will have 4 sections of paper.

12. Unfold one section and open so that fringe is on the outside.
13. Start at the bottom of your section and roll up to the top, untangling fringe as you go, if needed.
14. Once at the top, this is what your tassel will look like.

15. Find the center of your tassel and twist the tassel around the skinny end of a pen to form your loop.
16. Continue twisting
17. Twist tassel around the pen approximately 2-3 times.
18. The finished product.
I know this seems like a lot of steps, but once you do it a couple of times, it will seriously only take you about 5 minutes to make 4 mini garlands.

This poof of pretty mini tissue tassels makes me smile!

The last step to create a garland is to tie your tassels onto a piece of twine or string.

To add to a cake for a sweet topper, simply tie your twine onto 2 bamboo skewers and insert into cake.

To create a similar cake using the colors of your party, I purchased a plain white 8″ cake from Walmart. Then I added pearl sixlets around the top and alternated sixlets with sour balls around the base of the cake. This is a simple and inexpensive cake that anyone can easily make. 

Who’s ready for Spring??? ME!!!
Linking up to these fun parties: SNAP!, Skip to My Lou, Somewhat Simple, Tidy Mom, House of Hepworths, Someday Crafts, Tatertots & Jello
The post How to Make Mini Tissue Tassels appeared first on Paper Crush.
]]>Last week I shared the fun Monster Mash party that I styled for Erika at Sour Punch Studio and I promised a tutorial on the spooky monster marshmallow pops so here you go! These would make such a fun treat at your upcoming Halloween party and my kids LOVED eating them! You will need the […]
The post How to Make Monster Marshmallow Pops appeared first on Paper Crush.
]]>Last week I shared the fun Monster Mash party that I styled for Erika at Sour Punch Studio and I promised a tutorial on the spooky monster marshmallow pops so here you go! These would make such a fun treat at your upcoming Halloween party and my kids LOVED eating them!

You will need the following supplies:
Large marshmallows
Candy Melts
6″ lollipop sticks
Black food gel
White icing

Step 1: Insert your lollipop sticks into your marshmallows.

Step 2: Create the white of the eye by cutting the end off of a marshmallow.

Step 3: Microwave your candy melts and dip your marshmallows into the candy, covering completely. Place in styrofoam to dry.

Step 4: Immediately place your marshmallow ends onto the dipped marshmallows so that they will stick to the marshmallows while drying. Let dry for approximately 30 minutes.

Step 5: Once your marshmallows are dry, use your black gel to draw a circle on the white marshmallow.

Step 6: Add white dot to black circle using writing or cookie icing.

Step 7: Microwave additional colored candy melts and spoon into plastic ziploc bag. Cut off corner of plastic bag and drizzle over the top of the marshmallows.

Place your monster marshmallow eyes into a cute container using styrofoam as the base to hold the marshmallows upright. Now you have a fun treat for your Halloween party! The candy melts come in lots of different colors so choose some that match your Halloween theme.

The post How to Make Monster Marshmallow Pops appeared first on Paper Crush.
]]>Easter is almost here! But don’t worry if you don’t have your Easter dinner place cards yet because I have a quick and simple (but way cute!) idea to share with you today! We usually celebrate Easter with an Easter egg hunt for the kids and a big dinner with our extended family. So I […]
The post Simple Easter Place Card Holder + Tutorial appeared first on Paper Crush.
]]>Easter is almost here! But don’t worry if you don’t have your Easter dinner place cards yet because I have a quick and simple (but way cute!) idea to share with you today!
We usually celebrate Easter with an Easter egg hunt for the kids and a big dinner with our extended family. So I thought it would be fun to make some cute place card holders for the kids. They LOVE finding their name and where to sit at the dinner table.

Supply list:
1. Small terra cotta pot and base
2. Acrylic paints
3. Sponge brush
4. Wheatgrass
5. M&M’s or other small candies
6. Chalkboard clothespins
7. Plastic egg

Step 1 – Paint your pot & base. Use two coats of paint allowing 1 hour to dry in between coats.


Step 2 – Cut wheatgrass to fit the size of your pot and place in pot.


Step 3 – Place pot on painted base and add candies, chalkboard tag and plastic egg.


Now you have a fun, quick and easy placecard holder for Easter!
A few little hints: I found wheatgrass at my local grocery store, but Whole Foods carries it as well. And if you don’t have the chalkboard clothespin tags laying around your house, you can either write directly on the pot with chalk or simply print out a cute tag (like these from Wanessa Carolina Creations) and attach it with a clothespin. For more Easter printables, check out this post!
Does your family have some Easter traditions that you’ve developed over the years? How will you be celebrating Easter this year?
The post Simple Easter Place Card Holder + Tutorial appeared first on Paper Crush.
]]>On Monday I shared the fringed crepe paper streamers for a fun decoration at your next party, but there are TONS of other fabulous DIY decorations in the blogosphere. I’ve rounded up 10 other great ideas for you to use at your next party, all with links to fabulous tutorials! Tissue paper poms from Design […]
The post 10 DIY Birthday Party Decor Ideas appeared first on Paper Crush.
]]>
On Monday I shared the fringed crepe paper streamers for a fun decoration at your next party, but there are TONS of other fabulous DIY decorations in the blogosphere. I’ve rounded up 10 other great ideas for you to use at your next party, all with links to fabulous tutorials!

Photo via Design Dazzle
Tissue paper poms from Design Dazzle are wonderful for ANY celebration!

Photo via Blue Eyed Yonder
Geronimo style sparkly balloon streamers from Blue Eyed Yonder are fabulous for a chic party.

Photo via Anders Ruff
Paper plate polyhedron tutorial from Anders Ruff.

Photo via Oh Happy Day
Zig zag accordian streamers from Oh Happy Day.

photo via Martha Stewart
Tissue paper lanterns from Martha Stewart.

Photo via Visual Vocabulary
Tissue tassel garland from Visual Vocabulary.

Photo via Wants and Wishes Design
Balloon false ceiling from Wants & Wishes Design.

Photo via Libby Lane Press
Yarn chandeliers from Libby Lane Press.

Photo via Dana Made It
Beautiful ruffled streamers from Dana M
Which one would you like to try for your next party???
The post 10 DIY Birthday Party Decor Ideas appeared first on Paper Crush.
]]>