As you can probably tell, I’m totally into gold and polka dots and stripes right now, and I really want to incorporate more white and gold into my Christmas decor, so I came up with these DIY polka dot letters, which will fit perfectly on my mantel below our TV that’s mounted above our fireplace. […]
The post Gold Polka Dot Letters appeared first on Paper Crush.
]]>
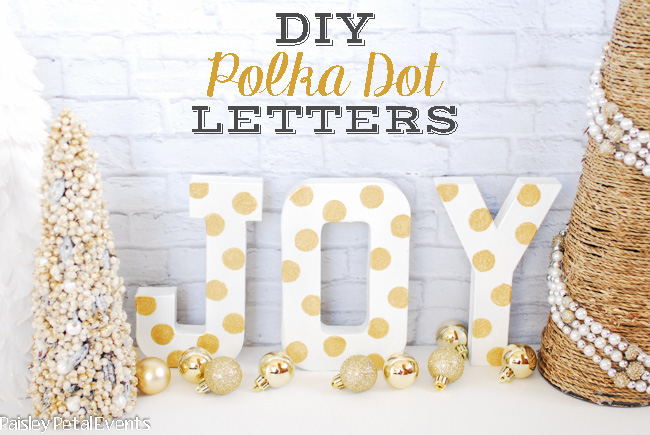
As you can probably tell, I’m totally into gold and polka dots and stripes right now, and I really want to incorporate more white and gold into my Christmas decor, so I came up with these DIY polka dot letters, which will fit perfectly on my mantel below our TV that’s mounted above our fireplace.

Here are the supplies you’ll need for this little project: paper mache letters, spray paint, acrylic paint and round sponge daubers.

First spray paint your letters in the color of your choice.

After letting your letters dry, pour some gold acrylic paint into a small container and use your circle paint sponge to add the polka dots to your letters. For this project I used a 1 inch circle sponge and a 1/2 inch circle sponge to touch up any uncovered areas.

I used my sponges and went over each polka dot twice to make the gold more dark.

Here are my finished letters displayed on my mantel.


Are you using any gold in your Christmas color scheme this year?? I seriously can’t get enough of it!! Stay tuned for another gold polka dot project next week! Hint: it’s a printable one! 
This post contains affiliate links.
The post Gold Polka Dot Letters appeared first on Paper Crush.
]]>Hi everyone! I apologize…this post should have gone up Friday, but I had to go out of town unexpectedly on Thursday morning and I didn’t have access to my computer all weekend while I was gone. But I REALLY wanted to show you the last 3 projects of our awesome Season to Sparkle Holiday party […]
The post Season to Sparkle Holiday Hop – Confetti Favors, Glitter Glasses & Pretty Holiday Napkins appeared first on Paper Crush.
]]>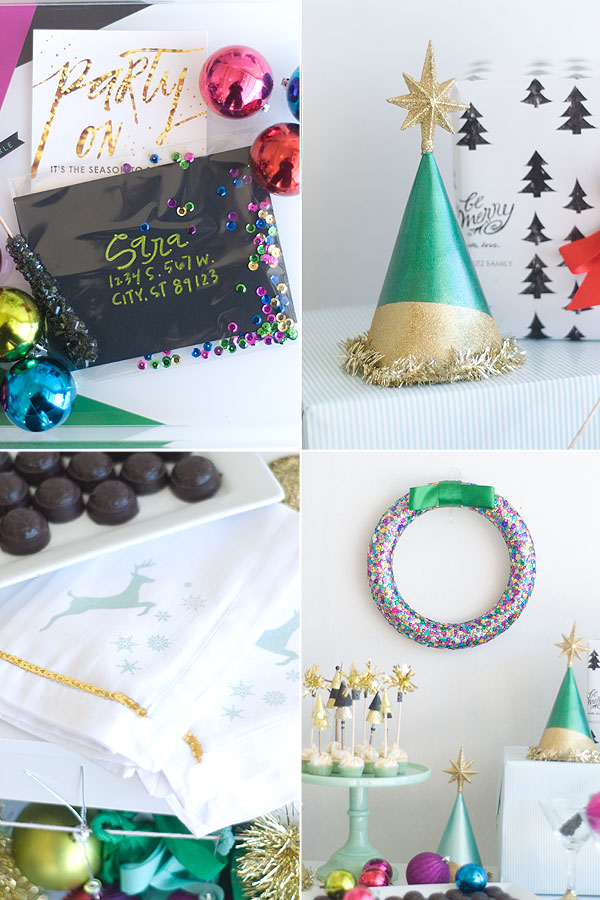
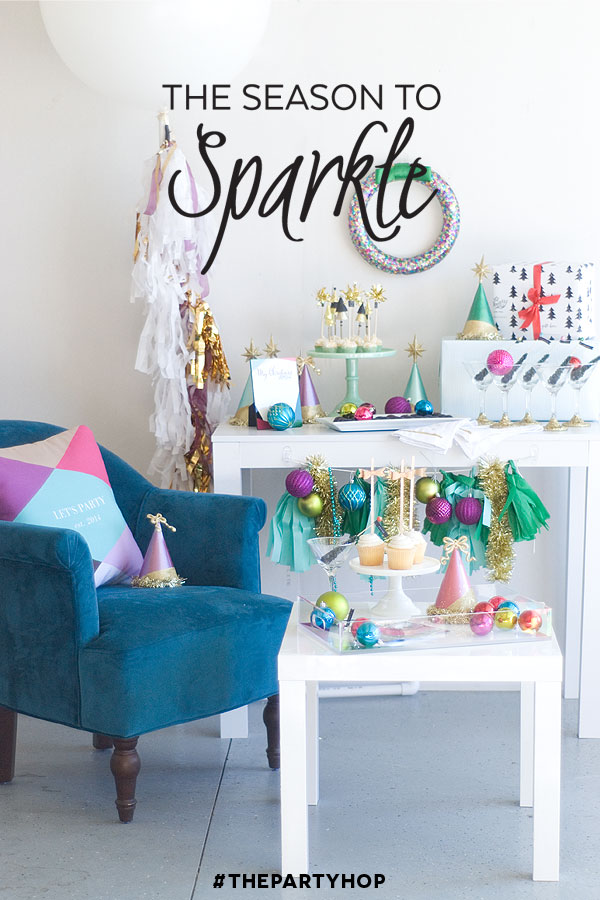
Hi everyone! I apologize…this post should have gone up Friday, but I had to go out of town unexpectedly on Thursday morning and I didn’t have access to my computer all weekend while I was gone. But I REALLY wanted to show you the last 3 projects of our awesome Season to Sparkle Holiday party hop. Today we have sparkly glitter adorned glasses, a fun confetti party favor & gorgeous party napkins to share with you.
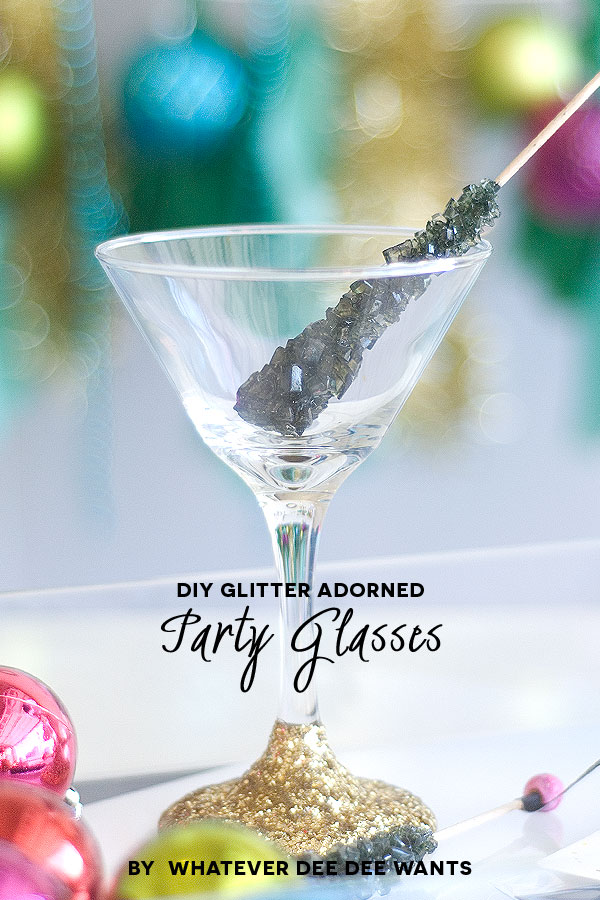
Love these festive glitter adorned party glasses from Whatever Dee Dee Wants.
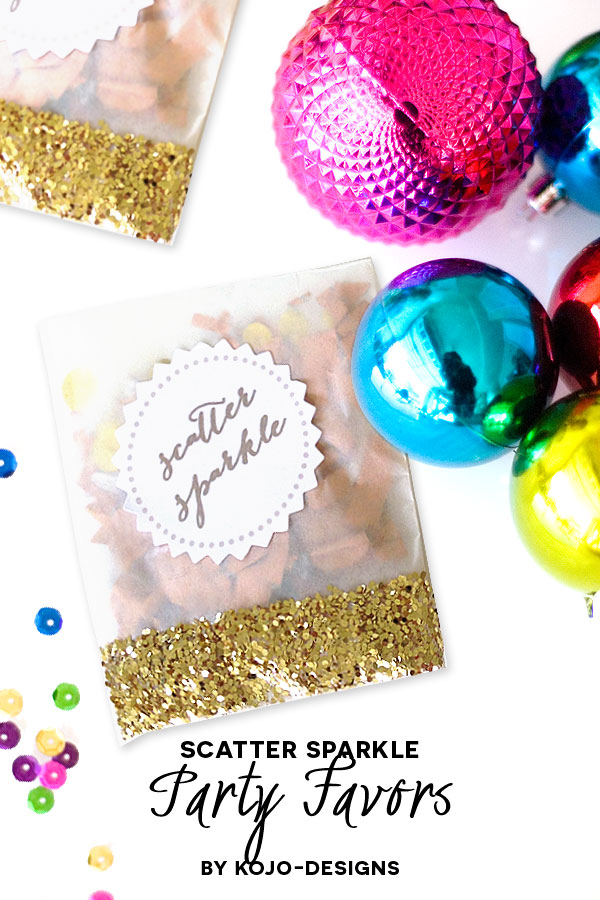
Fabulous sparkly confetti party favors from KoJo-Designs.
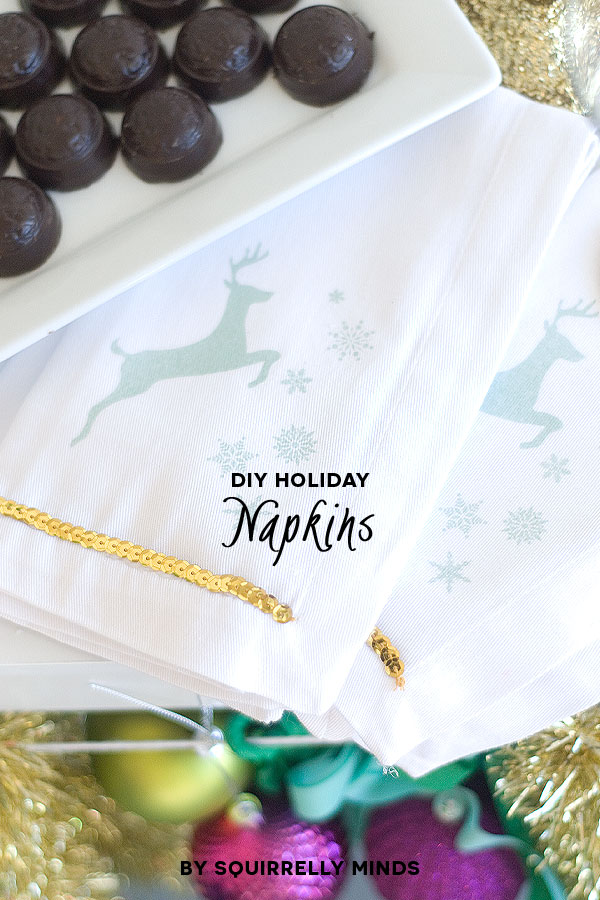
Gorgeous DIY holiday napkins from Squirrelly Minds.
Thanks everyone for following along with our Season to Sparkle Holiday party hop! I hope you got some fun ideas to incorporate into YOUR upcoming holiday parties and get-togethers!
If you missed any of our previous Season to Sparkle posts, just click HERE.
Have a fabulous day!
The post Season to Sparkle Holiday Hop – Confetti Favors, Glitter Glasses & Pretty Holiday Napkins appeared first on Paper Crush.
]]>Welcome to day 4 of our Season to Sparkle party hop! Hope you’re gathering some fun ideas for those upcoming holiday parties! I’m excited to share my contribution to the party today – some fun DIY glitter bow cupcake toppers, along with fabulous balloon fringe and and a festive garland for your party decor. In […]
The post Season to Sparkle Party Hop – DIY Glitter Paper Bow Cupcake Toppers, Balloon Fringe & Holiday Garland appeared first on Paper Crush.
]]>
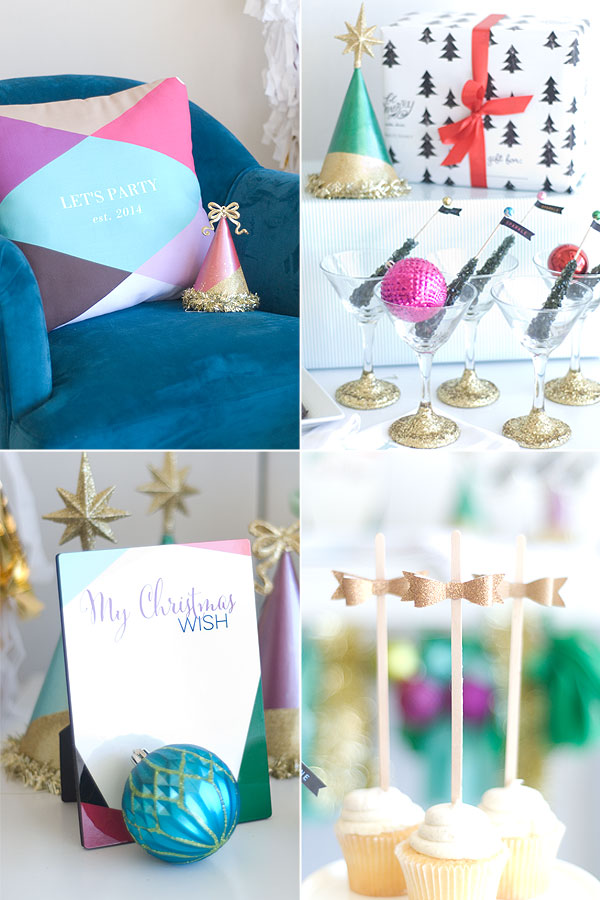
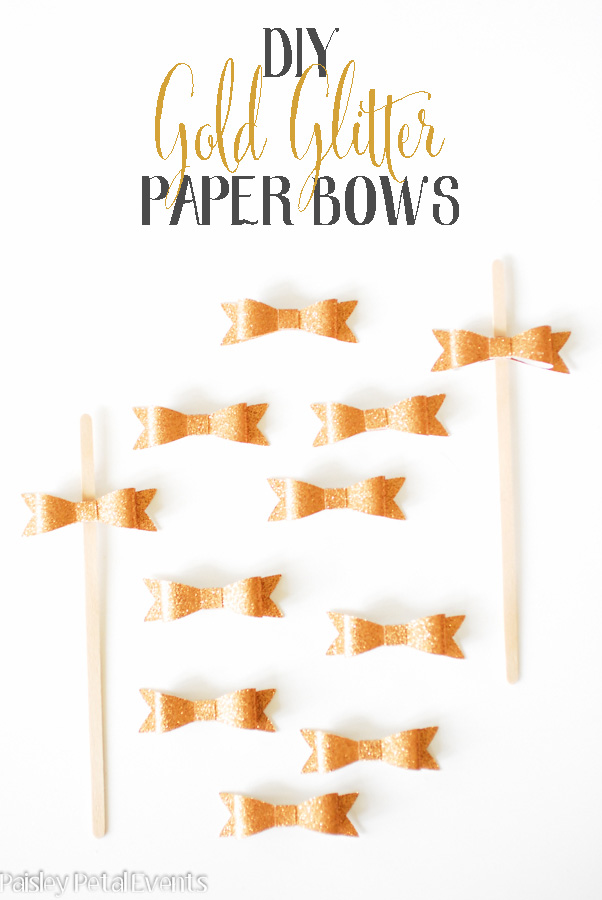
Welcome to day 4 of our Season to Sparkle party hop! Hope you’re gathering some fun ideas for those upcoming holiday parties! I’m excited to share my contribution to the party today – some fun DIY glitter bow cupcake toppers, along with fabulous balloon fringe and and a festive garland for your party decor.
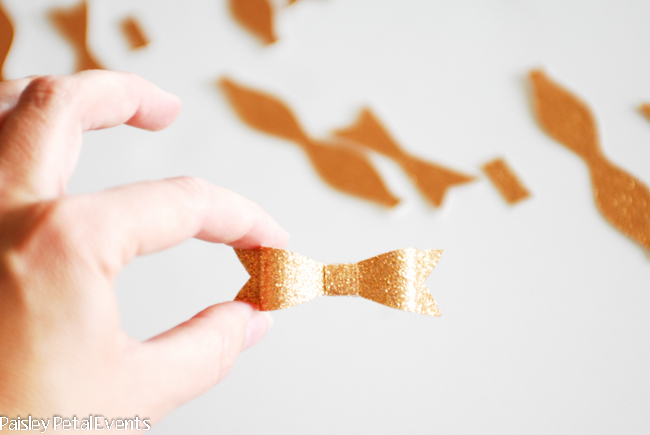
In case you haven’t noticed, I’m completely obsessed with gold right now and I’m just in love with these cute little glitter bows – I want to add them to EVERYTHING!!
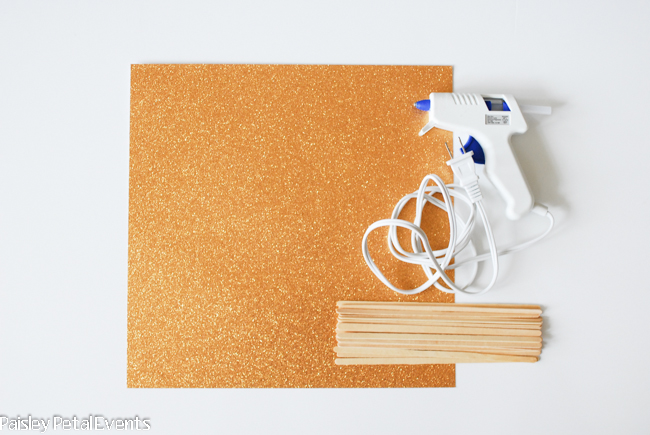
To make these darling bows, you just need a couple of things: glitter paper, wood sticks (mine are 7.5″) and a glue gun. I recommend a low-temp glue gun because your fingers will most likely be touching the hot glue a little bit to make these small bows You might also need some scissors if you don’t have a cutting machine.
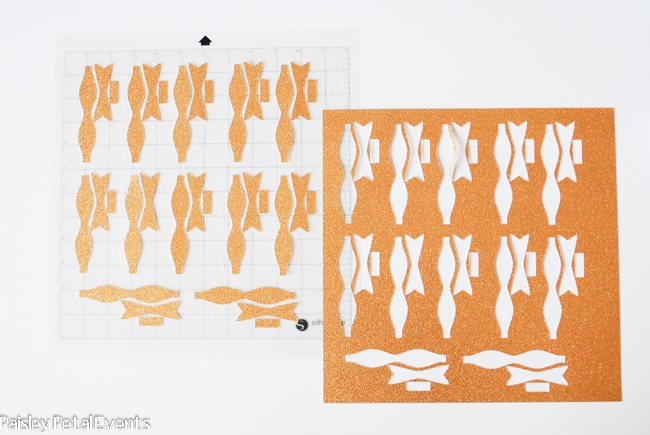
I used my Silhouette cutting machine to cut out the 3 pieces of my bow, using this shape and sized to 4.23″ x 1.67″. You don’t have to use a cutting machine to make these bows, it’s just is a lot quicker. Lia Griffith has a great paper bow printable that you just print onto the back of your glitter paper and then cut out by hand with scissors.
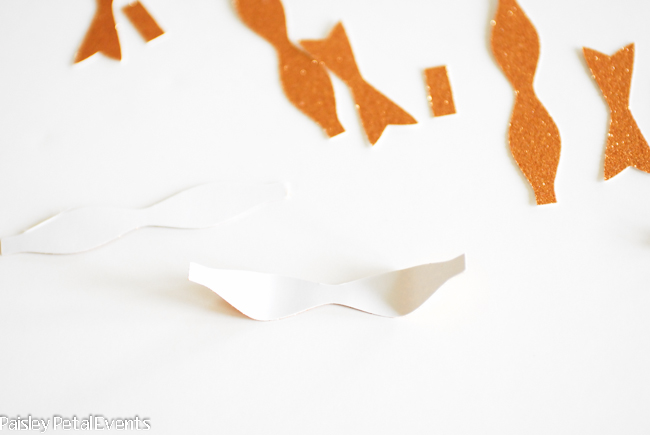
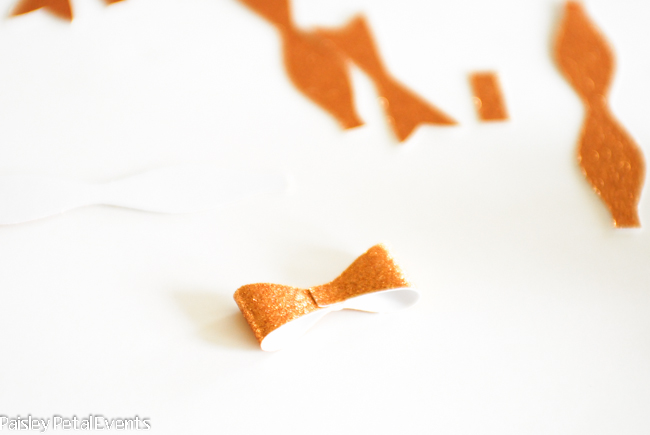
Now it’s time to assemble your bows. Take your bow shaped piece and fold the two edges in to the middle of the bow, using a dab of hot glue to hold the two ends in place.
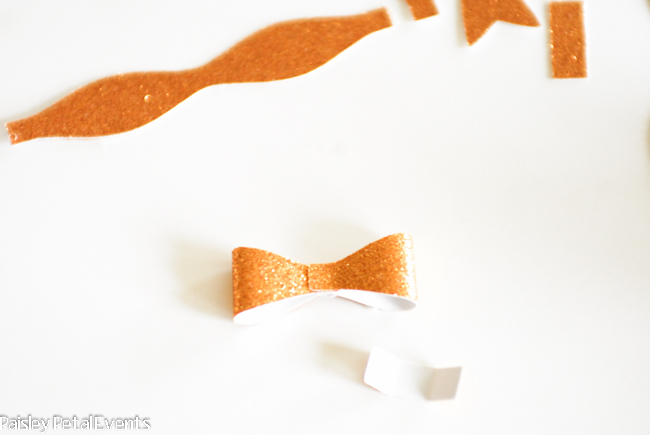

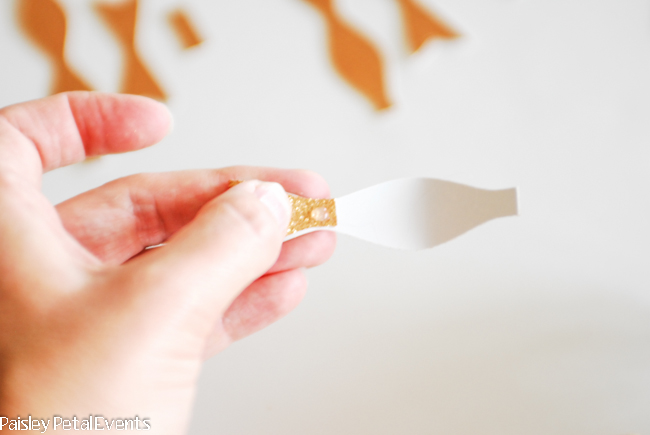
Next, take your small rectangle piece and wrap it around your bow, again using a dab of hot glue to hold the piece in place. You can see the little bit of hot glue on the back of my bow – that’s ok since it won’t be visible anyway.
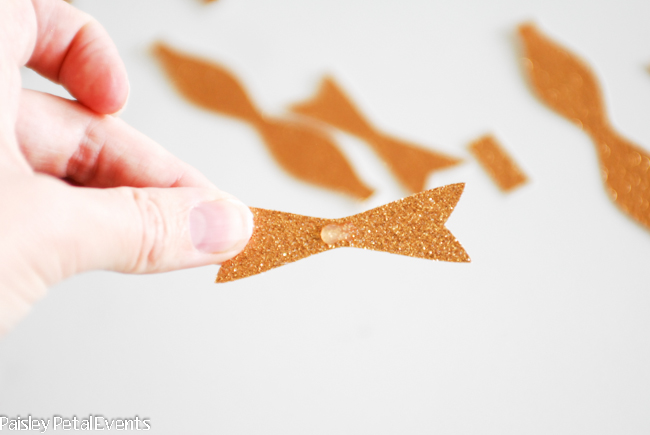
Add a dab of hot glue to the tail piece of your bow and attach your already made bow.
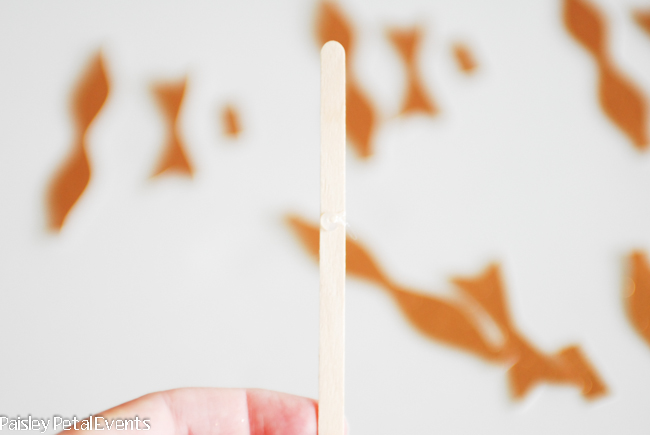
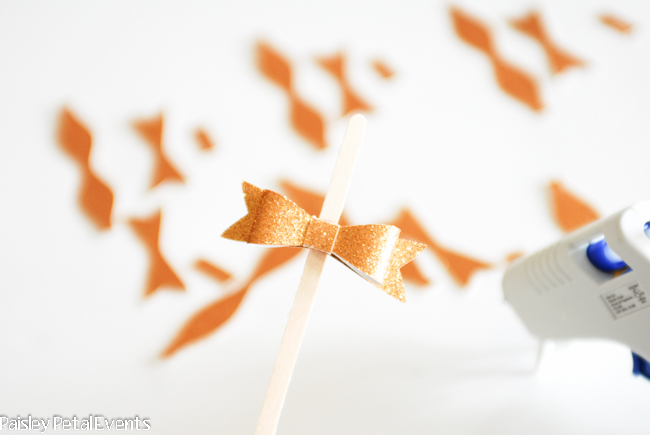
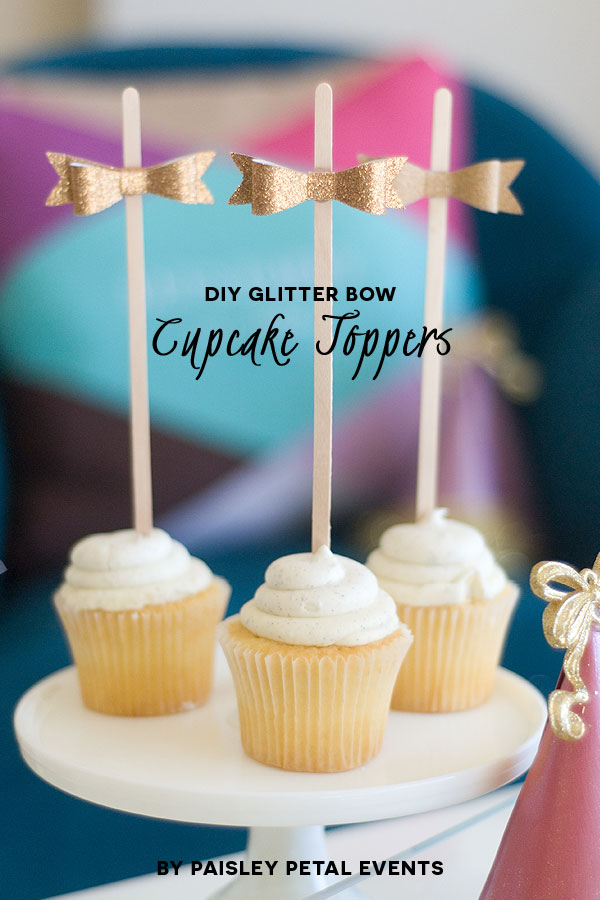
Last step is to add a dab of hot glue about 1 inch down from the top of your stick and attach your finished bow.
Bam! You’re done! How simple was that??!!
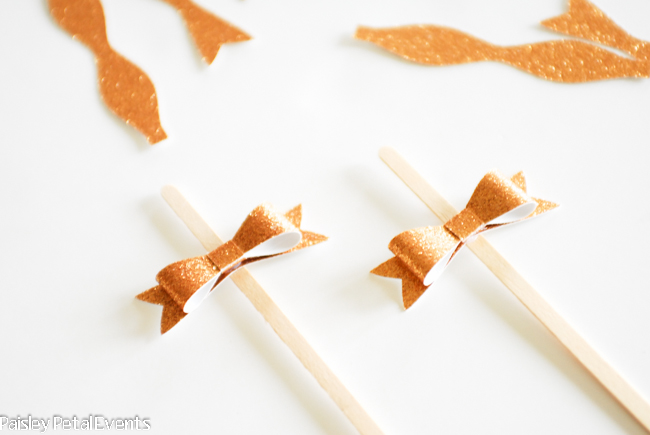
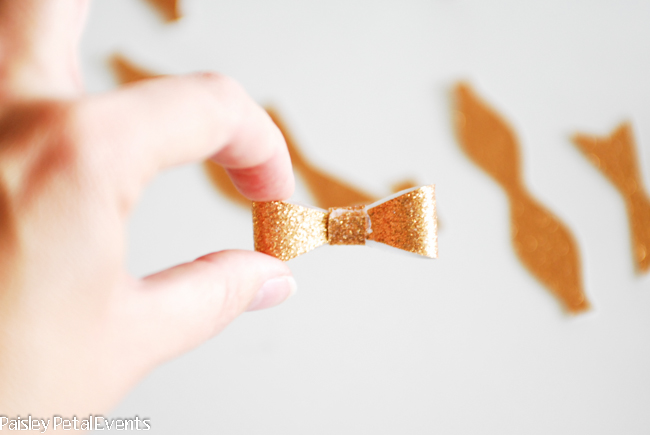
2 cute finished gold glitter paper cupcake toppers – aren’t they cute??!!
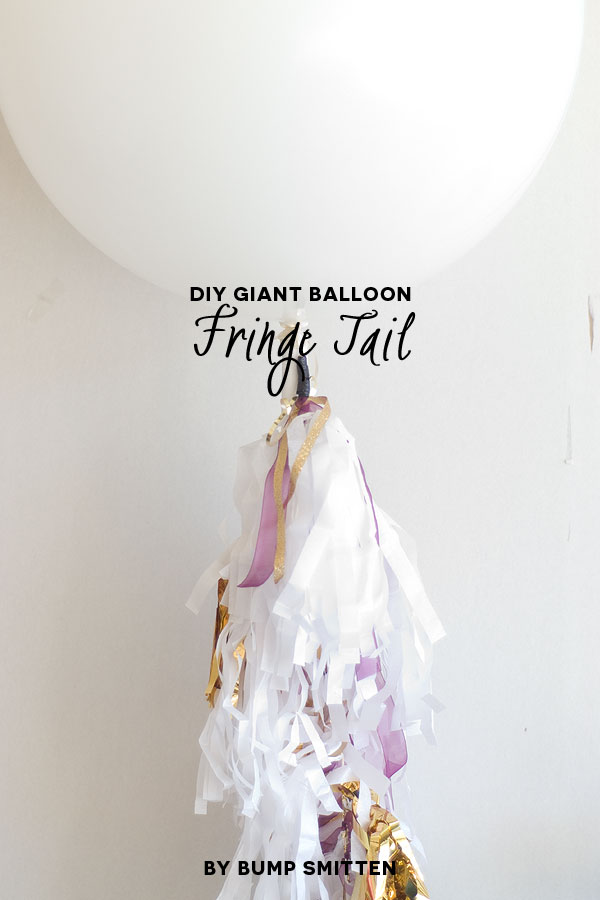
And don’t forget to hop over to Bump Smitten to learn how to make this awesome balloon fringe tail.
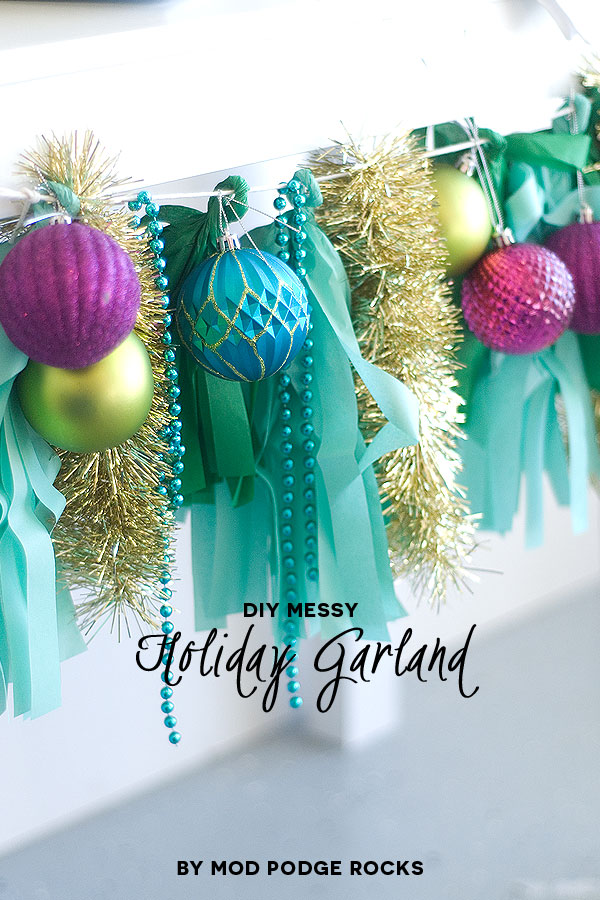
Along with this messy holiday garland from Mod Podge Rocks.
If you love this idea, I’d love for you to share with your friends via Facebook, Pinterest, or Twitter by clicking on the buttons below!
The post Season to Sparkle Party Hop – DIY Glitter Paper Bow Cupcake Toppers, Balloon Fringe & Holiday Garland appeared first on Paper Crush.
]]>My kids love going to the library to get new books and have some variety in their nightly reading. My 1st grader especially gets bored reading the same books we have in our collection at home, which is actually quite large because I LOVE books, but she does like to have new ones to choose […]
The post DIY Embellished Book Bag appeared first on Paper Crush.
]]>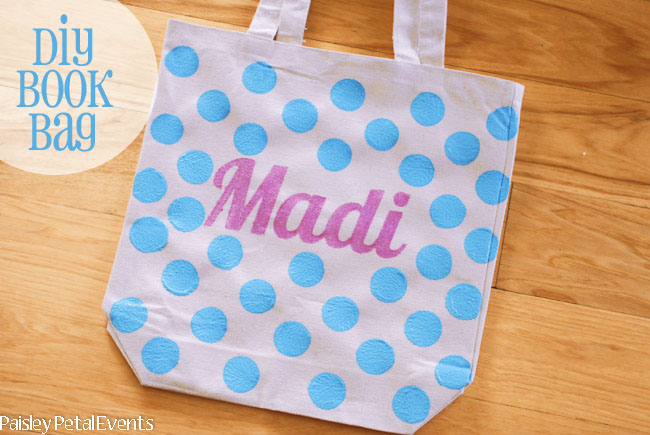
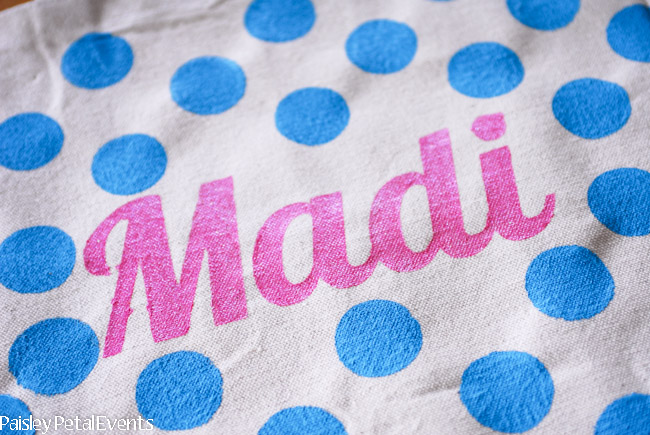
My kids love going to the library to get new books and have some variety in their nightly reading. My 1st grader especially gets bored reading the same books we have in our collection at home, which is actually quite large because I LOVE books, but she does like to have new ones to choose from as well. I thought it would be fun to make a bag for her to carry her pile of books to and from the library in. She had a great time helping me make it and is a great little project for kids to help with!
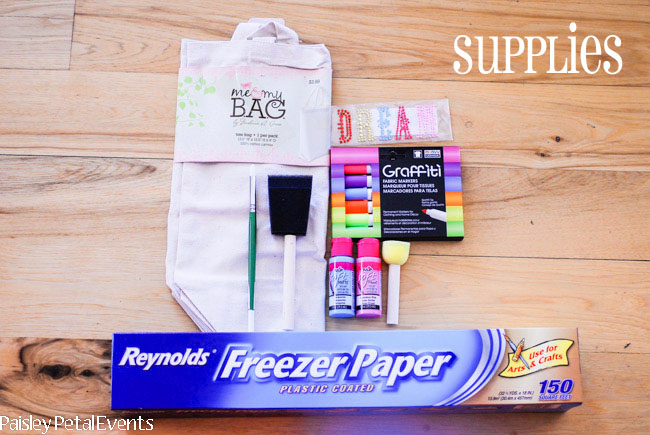
I let her choose the paint colors and she chose pink for the letters of her name and turquoise for the polka dots. Here are the supplies you will need for this project:
- Canvas bag
- Freezer paper
- Fabric paint
- Brush
- Round sponge brush
- Fabric markers & any other embellishments (if you wish)
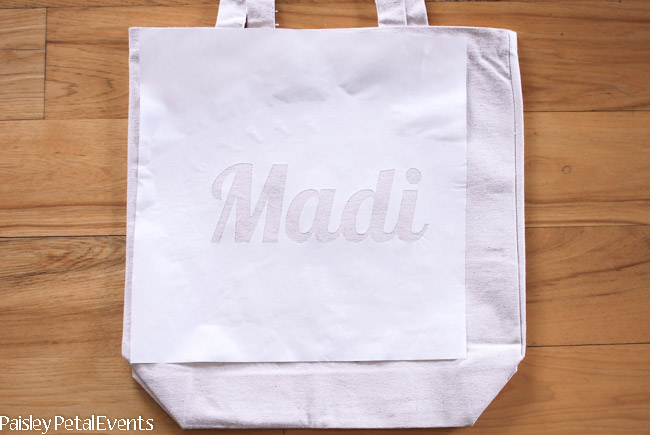
I used my Silhouette machine to cut out the letters of Madi’s name from the freezer paper. I’ve also read that you can print onto the freezer paper and cut out the letters using an xacto knife if you don’t have a Silhouette or Cricut cutting machine. Then you iron the freezer paper onto the bag, shiny side down.

Take your small brush and use the fabric paint to cover the cut out letters of your stencil. I applied 2 coats of paint and Madi was easily able to help with this step.
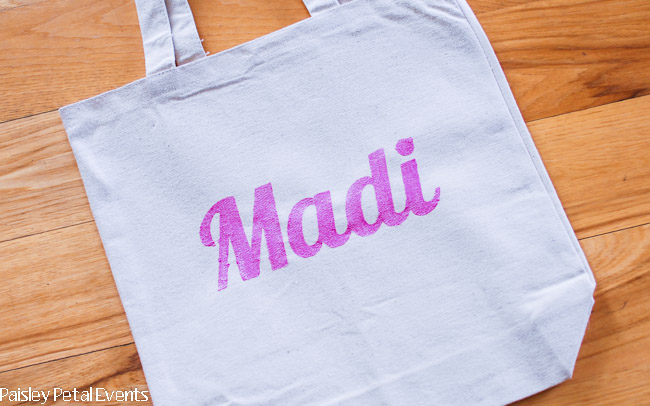
Carefully remove the stencil from your bag and let dry.

Now it’s time to add your polka dots. Use a round sponge brush to apply the dots. I placed the sponge in the correct place and Madi pressed the paint onto the bag.
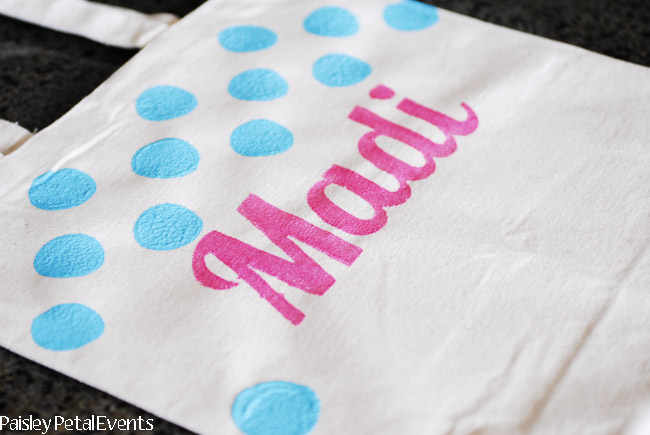
Continue adding your polka dots until the front of your bag is covered and let dry completely.

Once the front was dry, I let Madi decorate the back of the bag however she wanted. I found the rhinestone letters on clearance and then she used fabric markers to draw pictures and write on the bag along with a small round sponge brush to add some dots.

She’s been loving her new bag! (Although the little stinker wouldn’t let me take a picture of her carrying her bag!)

This is a great little craft project for the kids and I love that it’s something useful and won’t just get thrown away in a month!
The post DIY Embellished Book Bag appeared first on Paper Crush.
]]>Today I wanted to share how to make these cute DIY decorative paper medallions, which can be used for almost any occasion! The decorative edge on these medallions make them a little more feminine, but if you don’t want a feminine look, simply leave your edge straight. I like to make a bunch of them […]
The post How to Make Decorative Paper Medallions appeared first on Paper Crush.
]]>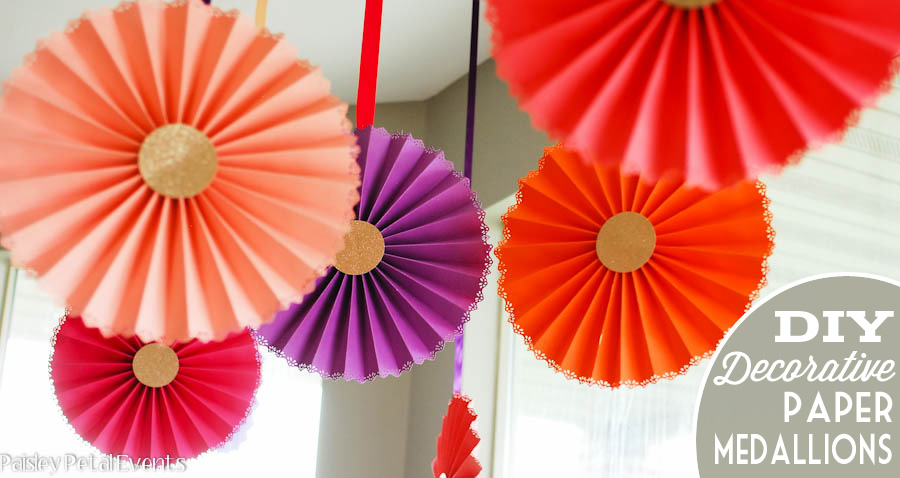
Today I wanted to share how to make these cute DIY decorative paper medallions, which can be used for almost any occasion! The decorative edge on these medallions make them a little more feminine, but if you don’t want a feminine look, simply leave your edge straight. I like to make a bunch of them to hang over a dessert or food table, in front of windows in your party area, or hang them from a chandelier for decor. Really any place you can find to use them in your party space will make it a little more festive and fun!
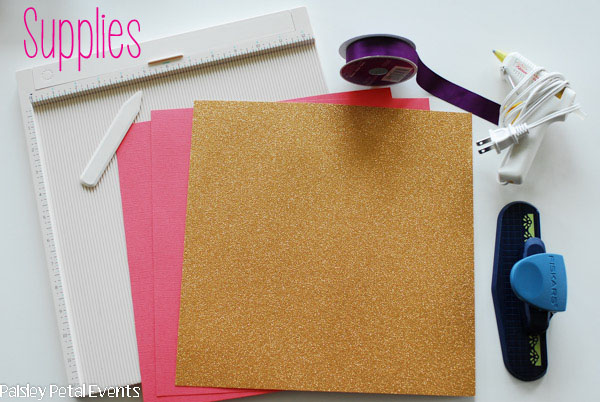
Supplies
2 pieces of 12×12 cardstock per medallion
Decorative edge paper punch (optional)
Ribbon
Coordinating paper (for center circle)
Glue gun
Scoring board (optional)
Instructions
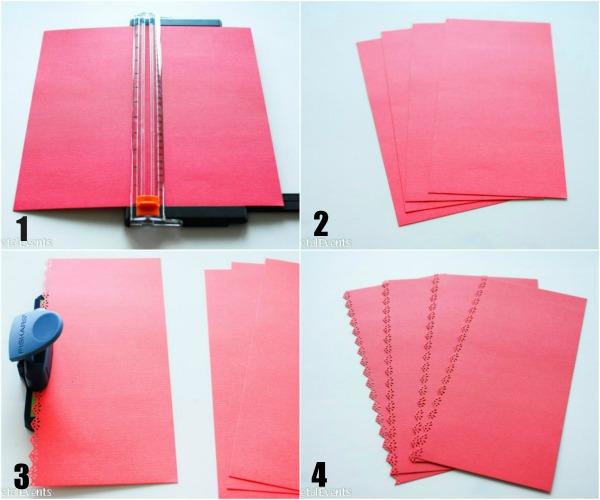
1. Cut each piece of your 12×12 cardstock in half
2. To make 4 pieces of 6×12 paper
3. Punch the 12″ edge of each piece of paper with your decorative punch
4. 4 pieces of decorated 6×12 paper

5. Score each piece of 6×12 paper at 1 inch increments. Decorative edge will be at the bottom.
6. Fold your paper accordion style along scored lines. If you don’t have a scorer, simply fold your paper, accordion style, every 1 inch.
7. Fold all 4 pieces of paper in the same manner.
8. Hot glue all 4 folded pieces together, end to end.
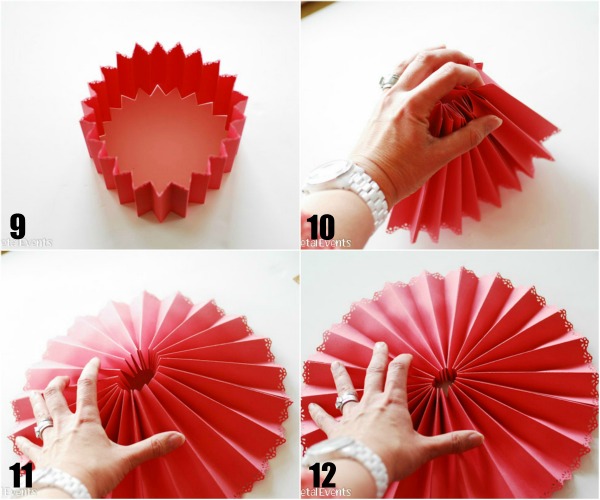
9. Glue 2 ends of paper chain together to form a circle.
10. Gather the circle together in the center.
11. Press down on center of circle
12. Until medallion is flat on your work surface.
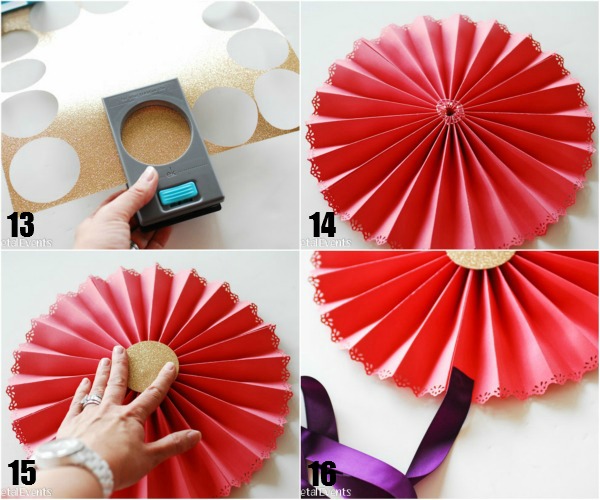
13. Punch (or cut) 2″ circle for the center of your fan.
14. Put a generous amount of hot glue in the center of your medallion to hold it together.
15. Place 2″ circle on hot glue.
16. Hot glue ribbon onto your medallion and hang!

Using the 12×12 cardstock will make your medallions approximately 12 inches across. If you would like smaller or larger medallions, cut the width of your paper accordingly.
I’ve found that white thumbtacks work best (better than tape) to hang from the ceiling. Tape is going to work better on windows or other smooth surfaces.
Now go make some fun hanging paper medallions for that upcoming event! 
The post How to Make Decorative Paper Medallions appeared first on Paper Crush.
]]>This post is part of a social shopper marketing insight campaign with Pollinate Media Group™ and Sharpie, but all my opinions are my own. #pmedia #StaplesSharpie https://cmp.ly/3/8vNxcO. Okay, I’ll let you in on a little secret… I hoard collect Sharpie markers – I LOVE them! All the pretty colors just scream “buy me” when I […]
The post Embellished Gift Card Holders using Sharpie Markers appeared first on Paper Crush.
]]>This post is part of a social shopper marketing insight campaign with Pollinate Media Group™ and Sharpie, but all my opinions are my own. #pmedia #StaplesSharpie https://cmp.ly/3/8vNxcO.
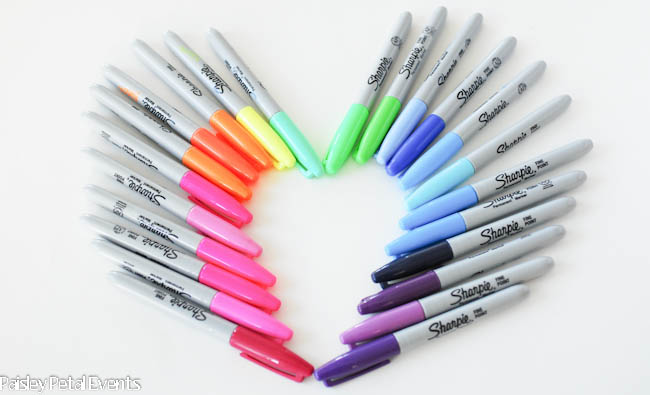
Okay, I’ll let you in on a little secret… I hoard collect Sharpie markers – I LOVE them! All the pretty colors just scream “buy me” when I see them at the store. I look at all the packages and try to figure out which colors I don’t have. I have this strange desire to collect EVERY color they make…I know, weird, huh?!

And just a little tip, for you fellow Sharpie lovers…Staples has select packages on sale right now! I bought the 12 pack of multi-colored sharpies for $6 (awesome deal!), the 5 pack of Neon Sharpies for $5 and the 4 pack metallic pens for $5 as well! You can ALWAYS use more Sharpies, especially during the holidays when you have so many uses for these little cuties!

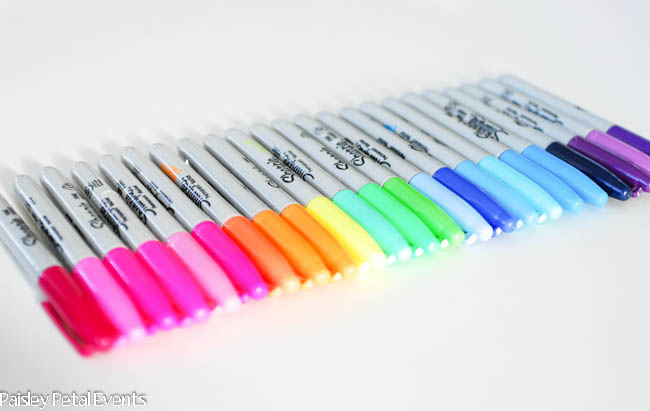
First I had a little fun taking pics of my rainbow of Sharpies
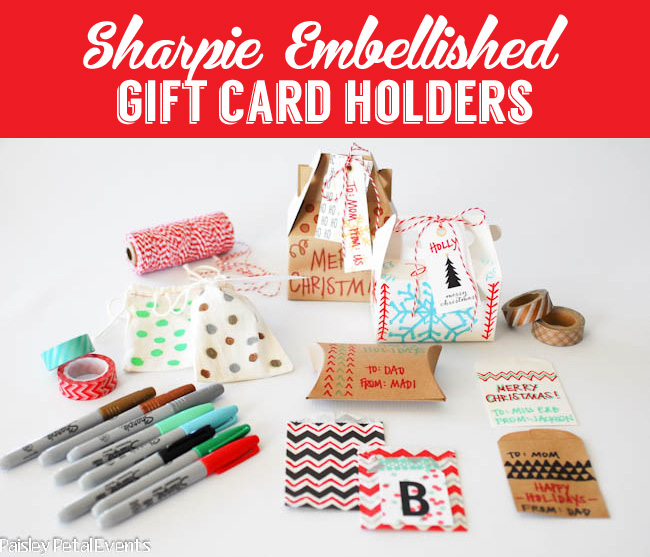
Then I got to work making my Sharpie embellished gift card holders!
I myself love to pick out very personalized gifts for everyone – I enjoy finding just the right gift for the loved ones on my Christmas list, but sometimes a gift card is the best way to go. Some people just have everything or really just want a gift card so they can pick out their own gifts. Teachers, for example, LOVE to get gift cards as gifts. I think they get tired of the goodies and mugs and they can always use gift cards to their favorite stores or restaurants!

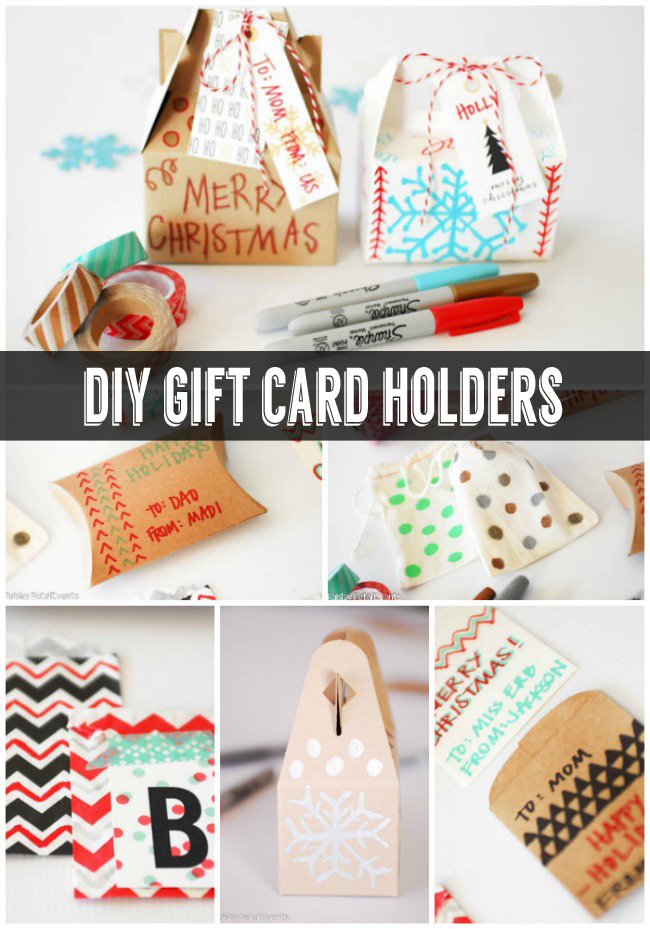
Instead of simply handing them a gift card in the package it comes in, I would suggest embellishing your own gift card holder with Sharpie markers to give it more of a personal touch! I used small things I had in my craft stash to hold my gift card holders – small white or kraft gable boxes, small kraft, white or patterned paper sacks, a pillow box, and muslin drawstring bags. Each of these are just the perfect size to hold those fun little gift cards.
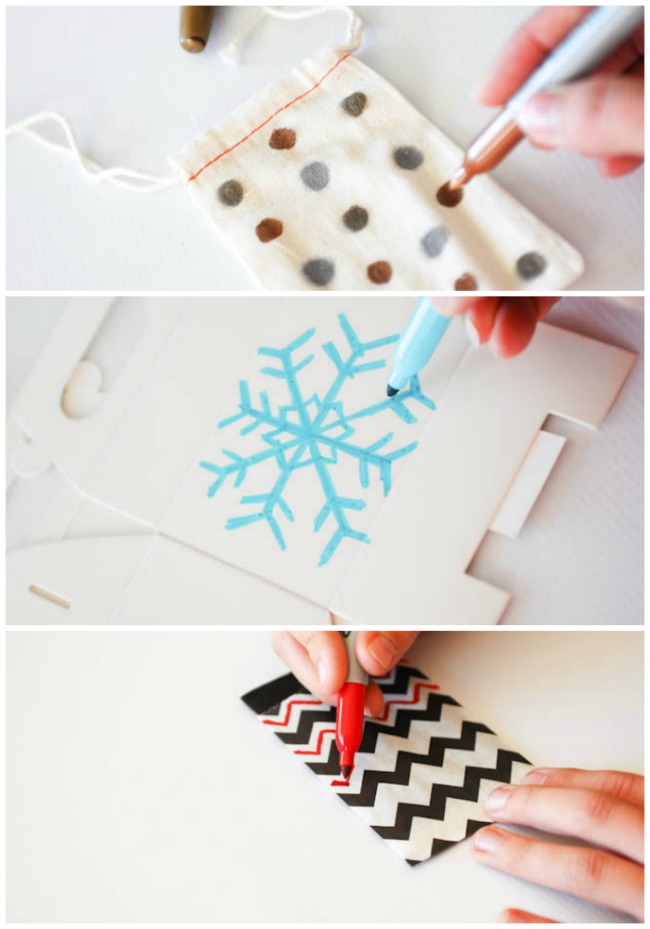
Simply use your colored and metallic Sharpie markers to decorate your gift card holders, add a little tag if you wish and that’s it! Your gift card holder is now personalized and ready to give.
If you’re in need of some printable gift tags to attach to your embellished gift card holders, visit these posts for some of my favorite free printable gift tags. Or this post for more DIY gift card holders.
And be sure to check out Sharpie’s social media accounts for more fun projects to create with your favorite Sharpie pens!
Facebook | Pinterest | Instagram | Twitter
The post Embellished Gift Card Holders using Sharpie Markers appeared first on Paper Crush.
]]>As I mentioned earlier this week, I was looking for some new, simple decorations I could add to my gold Christmas tree this year to spice it up a bit. I showed you how I made some glittered pinecone ornaments and today I’ll show you how I made a simple glitter letter garland. I saw […]
The post How To Make A Simple Glitter Letter Garland appeared first on Paper Crush.
]]>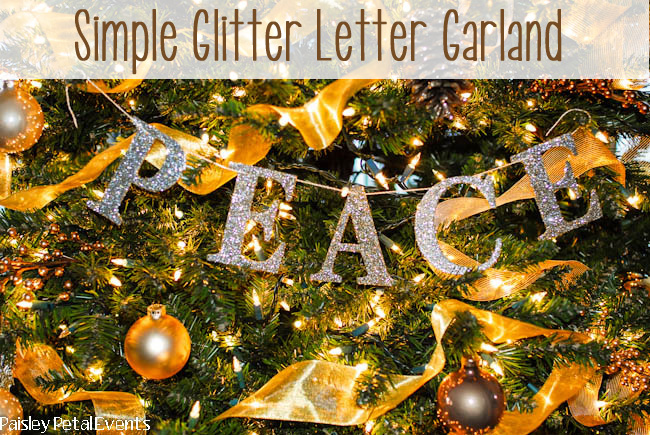
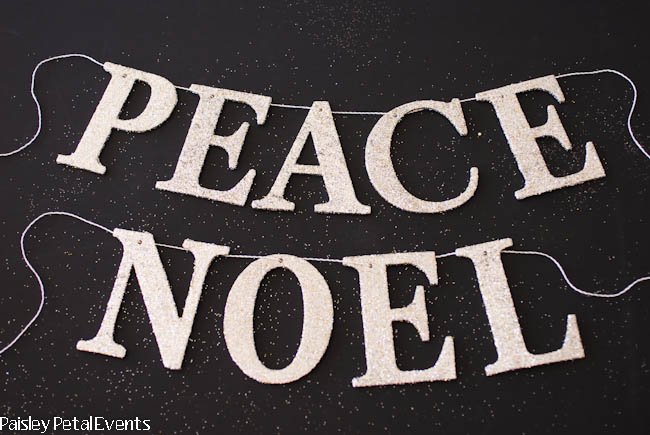
As I mentioned earlier this week, I was looking for some new, simple decorations I could add to my gold Christmas tree this year to spice it up a bit. I showed you how I made some glittered pinecone ornaments and today I’ll show you how I made a simple glitter letter garland.
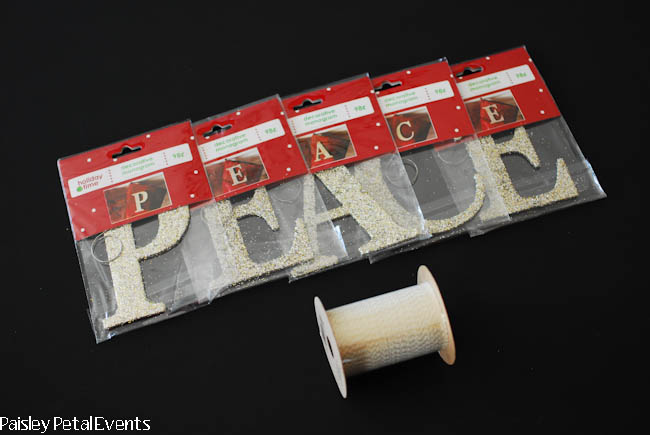
I saw these pre-glittered letters at Walmart for .97 cents each and grabbed a whole bunch of different letters to make some simple garlands. They didn’t have every letter available so I had to make do with what letters they did have. The vowels were hard to come by! Then I found this cute gold baker’s twine in the dollar bin at Target. Boy, that Target Dollar Spot sure gets me every time!
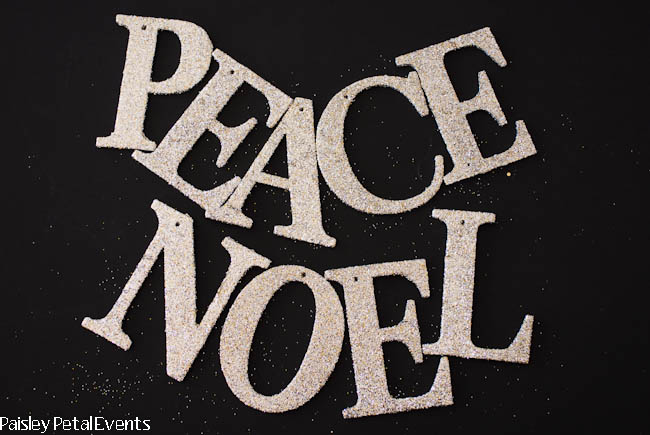
I took my letters out of the package and made them all cute for a second.
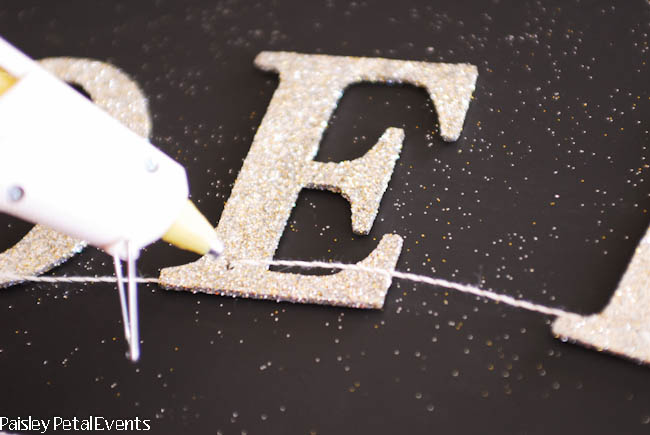
Then you simply thread your twine through the pre-drilled holes in the letters and glue the twine to the back of the letters.
Let your hot glue dry.
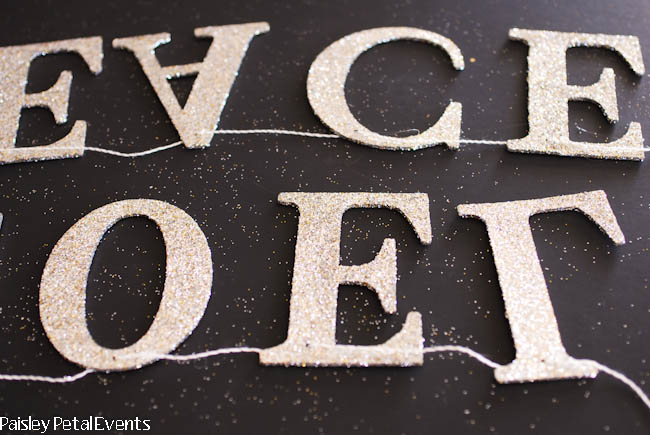
And your garland is ready to hang! I added mine to my Christmas tree, but you could easily use it on your mantle or on a table to dress it up too.
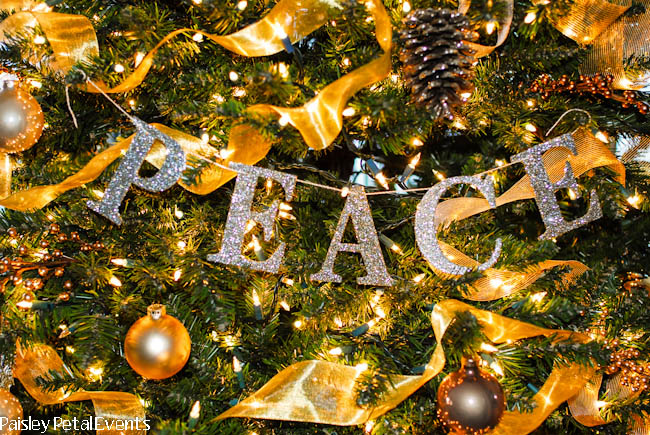
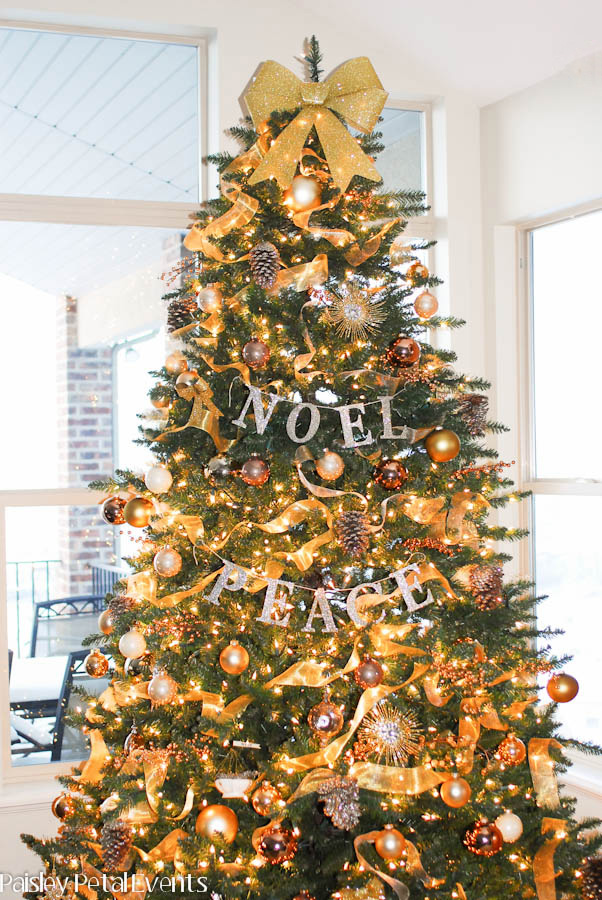
And here they are on my tree. Just ignore the section of burned out lighs. I was sick of fixing all the burnt out bulbs and gave up!
The post How To Make A Simple Glitter Letter Garland appeared first on Paper Crush.
]]>I wanted to add some new ornaments to my gold Christmas tree this year and when I was sent a box of fun Recollections glitter from Michaels stores, I started thinking about what I could make to give my tree some new life. I came up with these DIY glitter pinecone ornaments and I LOVE […]
The post Glitter Pinecone Ornaments appeared first on Paper Crush.
]]>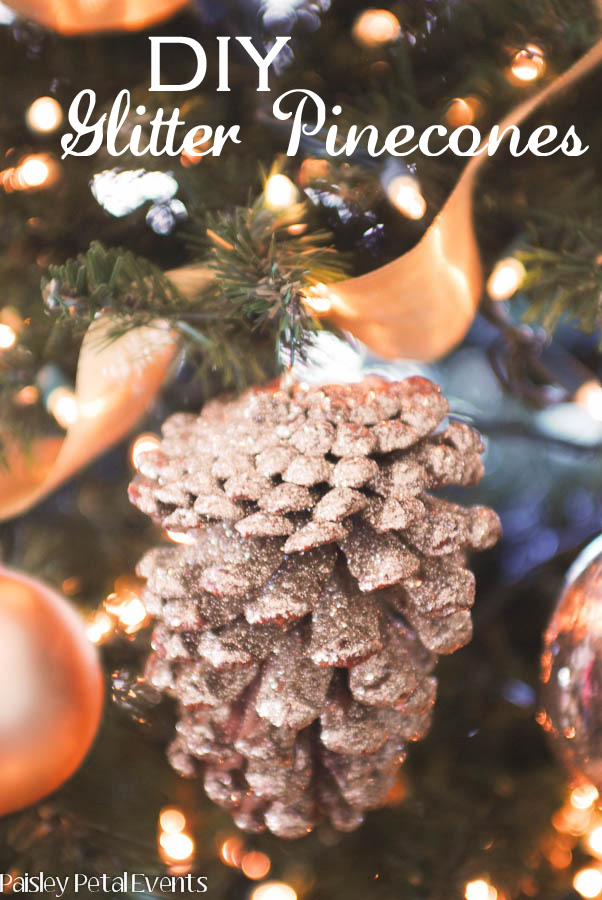
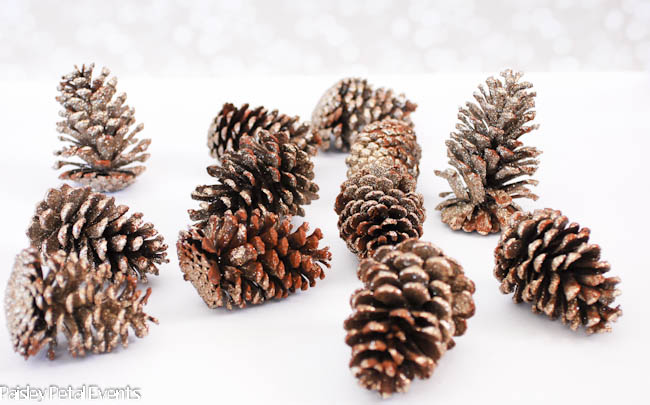
I wanted to add some new ornaments to my gold Christmas tree this year and when I was sent a box of fun Recollections glitter from Michaels stores, I started thinking about what I could make to give my tree some new life. I came up with these DIY glitter pinecone ornaments and I LOVE how they turned out!
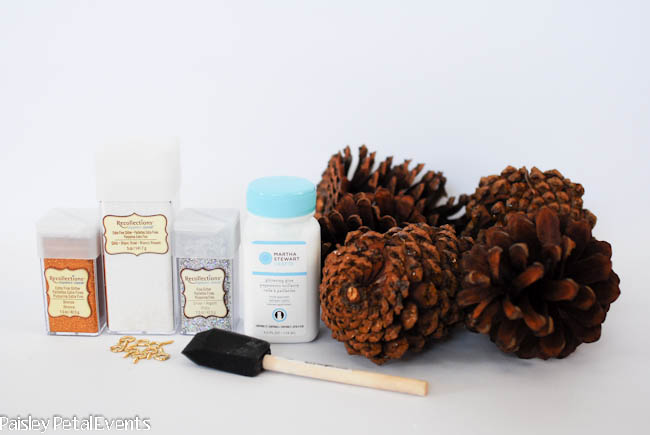
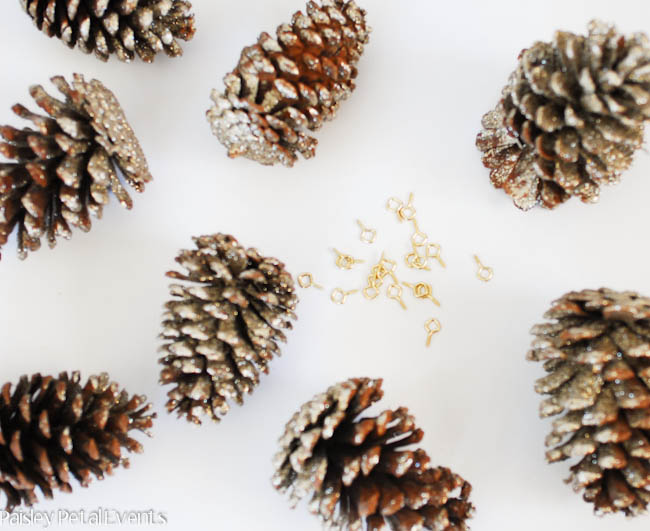
To make these glitter pinecone ornaments you will need large pinecones, glue (or mod podge), a small brush, glitter and 1/2″ screw eyes. I found my large pinecones at Walmart.
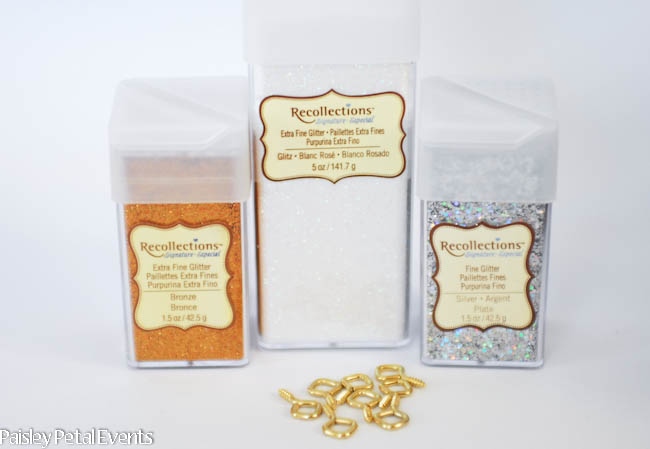
Recollections glitter is found exclusively at Michaels craft stores starting at $3.99 a bottle. They sell it individually or in packages, as well as different colors and textures such extra fine, chunky and tinsel. I located the 1/2″ brass screw eyes at Home Depot in a picture hanging kit.

First, apply the glue to your pinecones using a small brush to reach in between all layers of the pine cone.
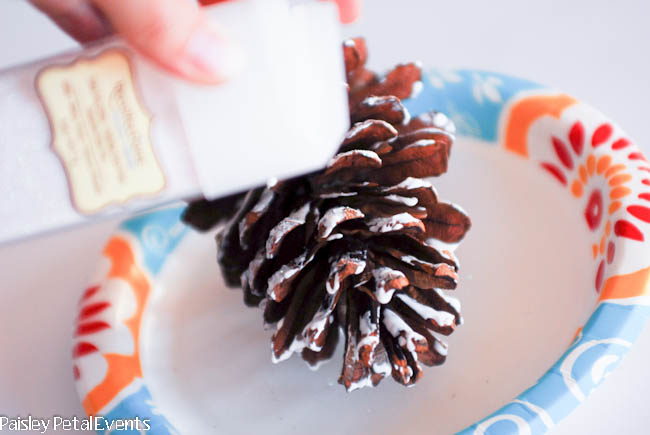
Next, generously sprinkle glitter all over your pinecone to cover all glue areas.
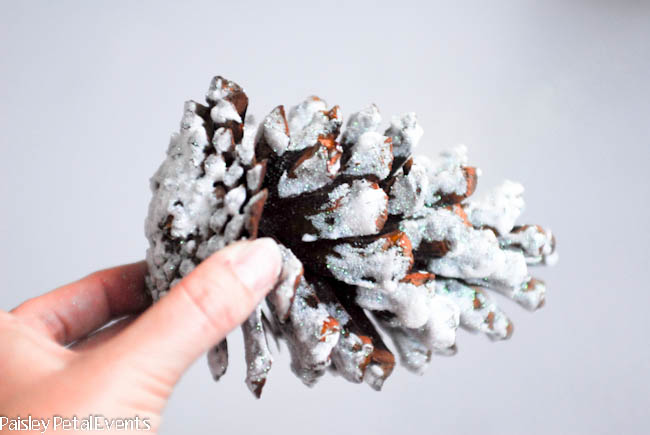
Here’s the pine cone right after the glitter was applied but before the glue had dried.

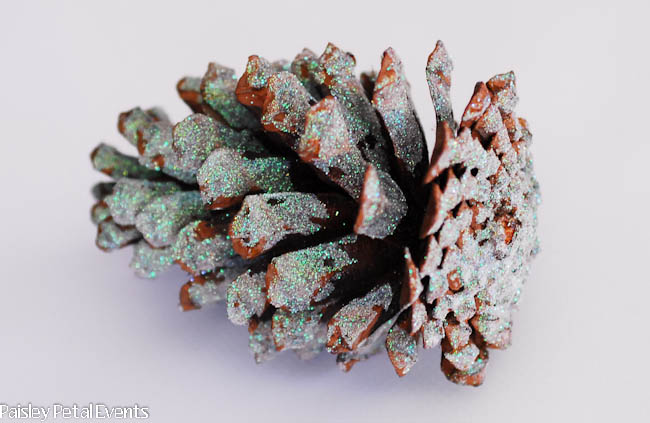
I used a white iridescent glitter on this pine cone and it turned out very pretty once the glue had dried, but I didn’t love it with the rest of my tree decor so I used gold glitter for the other pine cones I made.

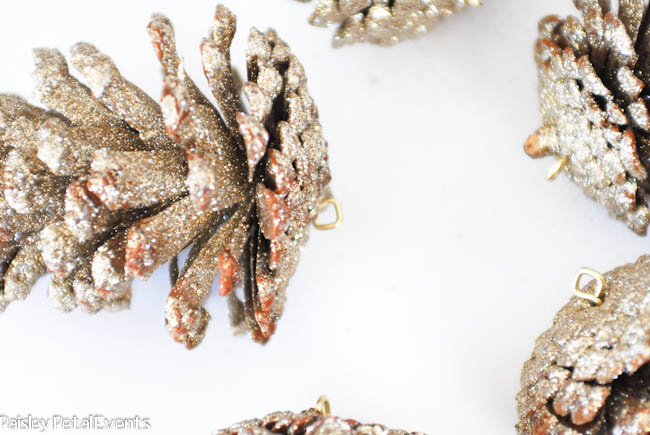
Once your pinecones have dried complete, simply push & twist the screw eye into the top of your pine cone, attach an ornament hanger and hang on your tree!

Here’s my gold Christmas tree with my new glitter pinecone ornaments along with a few other additions – the glittered letters are new too! Glitter can be used for so many fun projects, don’t you think?! The tutorial for making those is coming soon.
***I was provided product and compensation in exchange for this post, but all opinions are completely my own.
The post Glitter Pinecone Ornaments appeared first on Paper Crush.
]]>So are your wheels turning with some ways you can make the holiday season a little extra special with a few hand made touches? I hope so! Today’s Handmade Holiday Party Hop features include some wonderful DIY ornaments! I guarantee the kids will want to help with some of these great handmade ornament ideas – […]
The post A Handmade Holiday : DIY Ornaments appeared first on Paper Crush.
]]>![]()
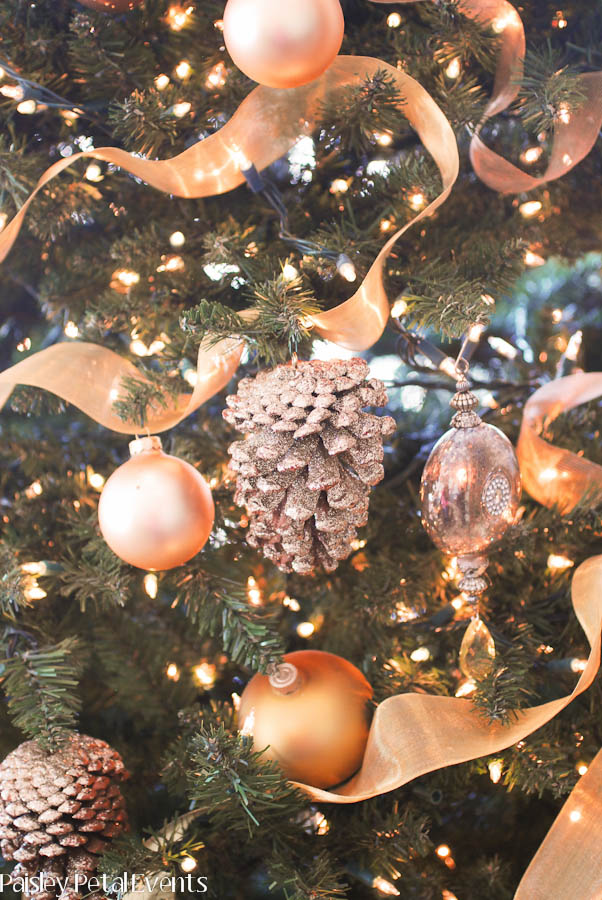
So are your wheels turning with some ways you can make the holiday season a little extra special with a few hand made touches? I hope so! Today’s Handmade Holiday Party Hop features include some wonderful DIY ornaments! I guarantee the kids will want to help with some of these great handmade ornament ideas – let’s put them to work and make the tree a little brighter this year!
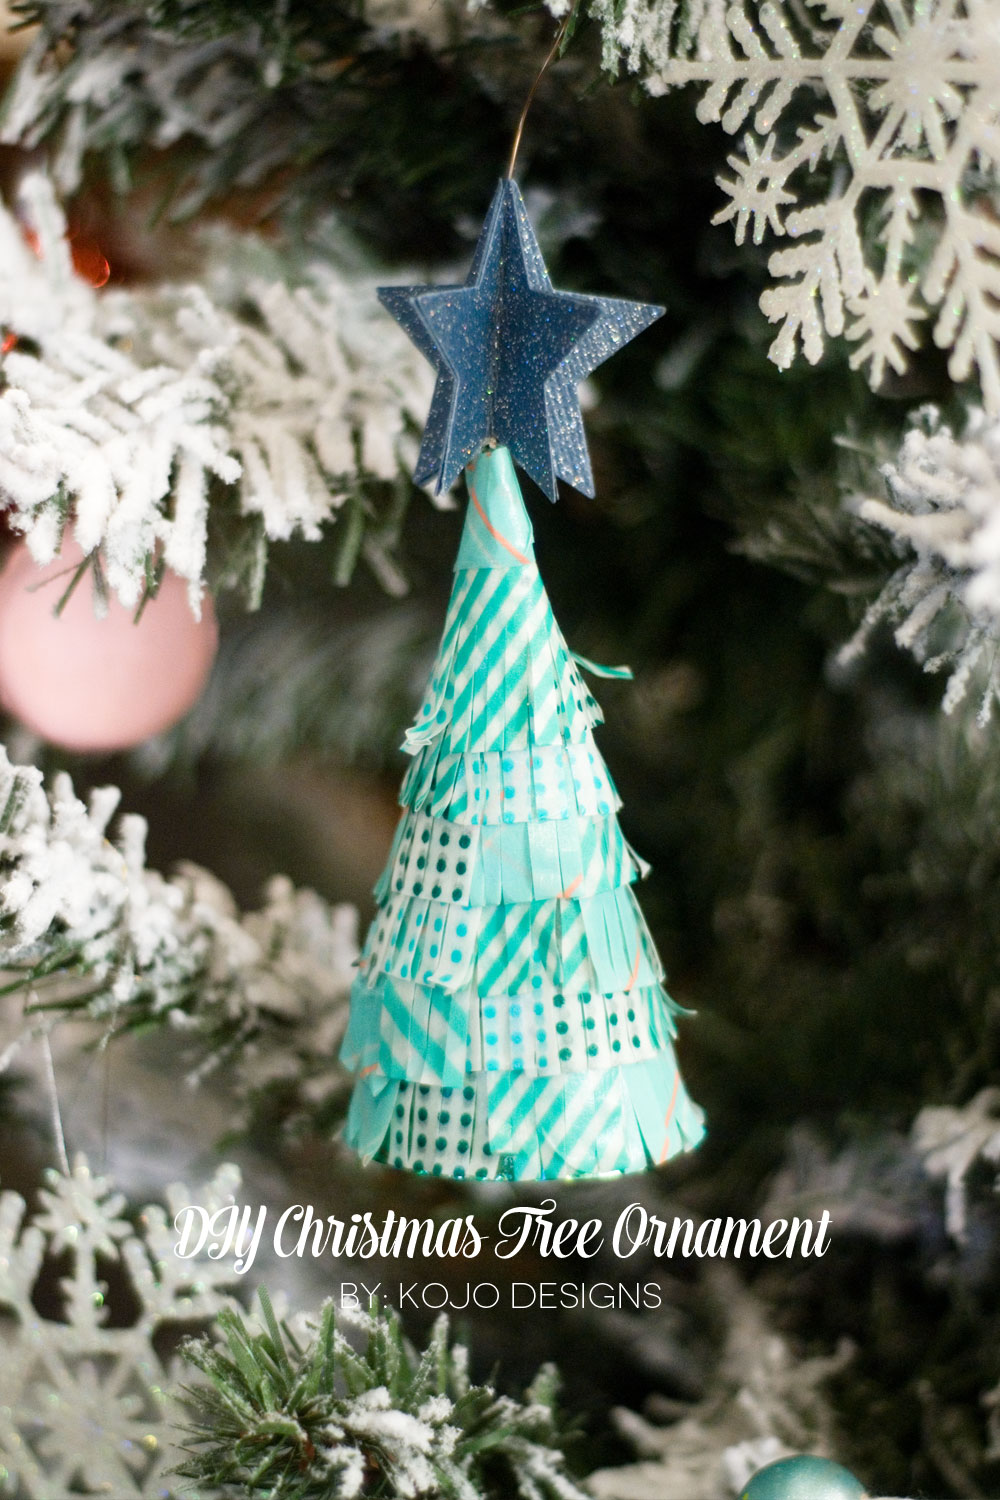
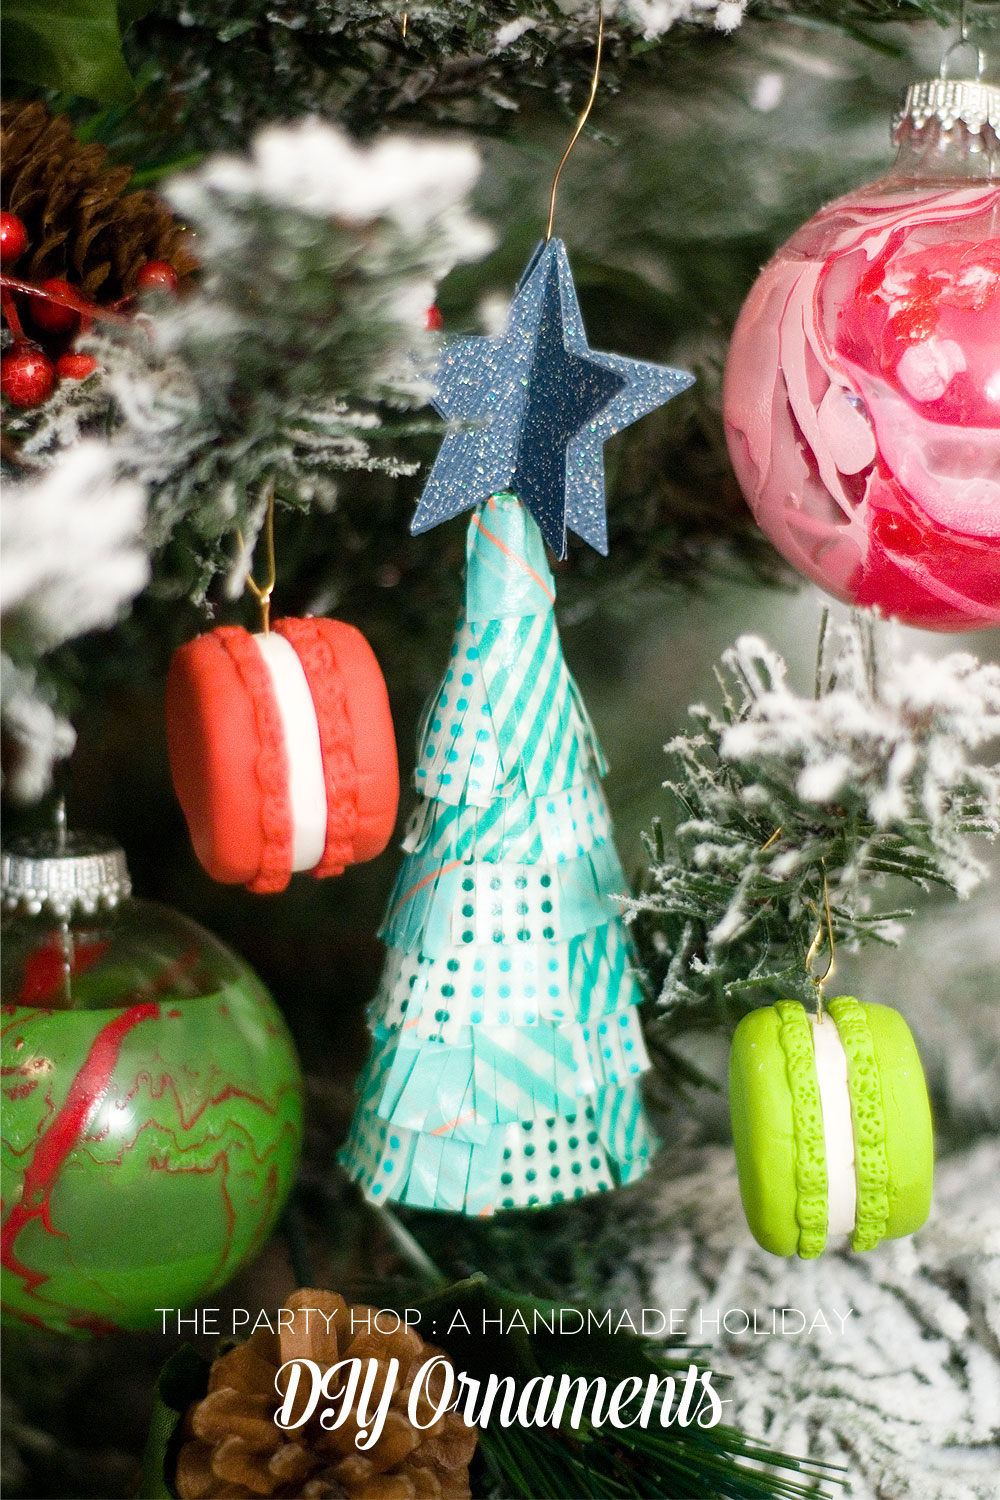
Fun washi tape Christmas tree ornament from kojodesigns.
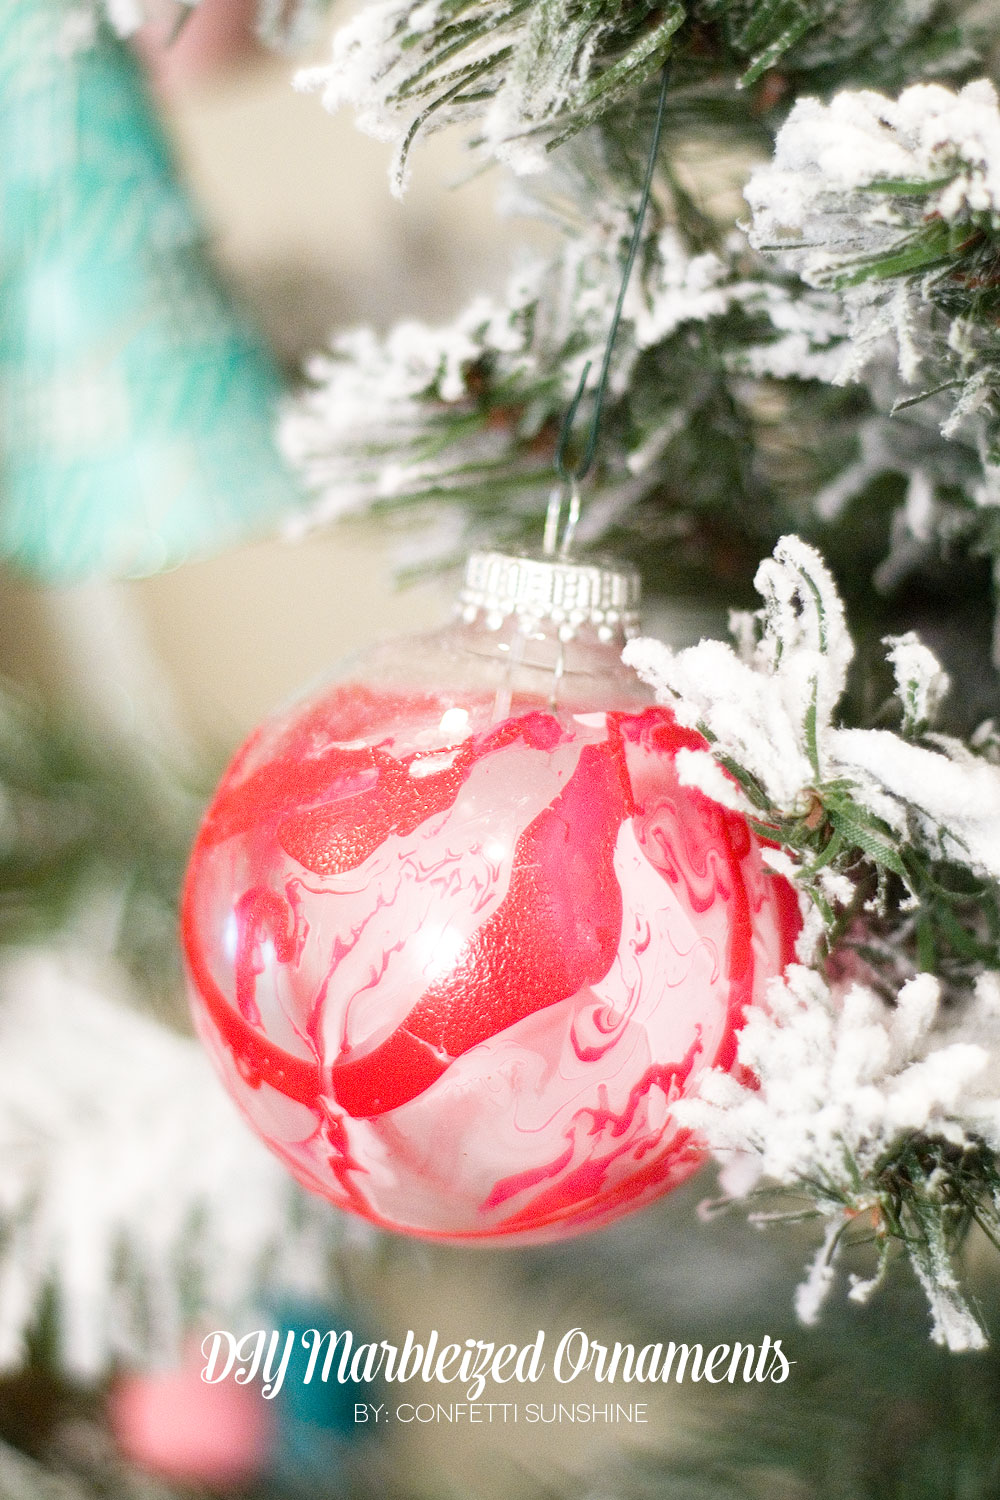
Pretty marbleized ornaments from Confetti Sunshine.

Cute DIY macaron ornament from Creative Juice.
So fun, huh?! Tomorrow we’re sharing some fabulous DIY party decorations so be sure to come back!!
The post A Handmade Holiday : DIY Ornaments appeared first on Paper Crush.
]]>Last week, over at Design Dazzle, I shared this simple and fun Christmas craft idea you can do with the kids – make washi tape ornaments! Yes, I know…another washi tape project…sorry! There’s just too many fun uses for the stuff 😉 I ran across some plain white cardboard ornaments at IKEA, and I knew […]
The post Washi Tape Ornaments appeared first on Paper Crush.
]]>Last week, over at Design Dazzle, I shared this simple and fun Christmas craft idea you can do with the kids – make washi tape ornaments!
Yes, I know…another washi tape project…sorry! There’s just too many fun uses for the stuff I ran across some plain white cardboard ornaments at IKEA, and I knew I could come up with a fun Christmas craft for the kids.

For this project you’ll need thick cardboard or chipboard ornaments, washi tape and an xacto knife – that’s it!

These particular ornaments had a white ribbon already attached, so first I removed the ribbon so the kids could decorate the ornaments.
Step 1: Add Christmas-colored washi tape to ornaments.
Step 2: Parents – use an xacto knife to cut off the excess washi tape.

Step 3: Decorate back side of ornaments with washi tape.
Step 4: Parents – use an xacto knife to cut off excess tape.

I then tied the ribbon back on the ornaments and that’s it – ready to hang on the tree!

My youngest is 5 and she loved working on this ornament craft! Younger children could also easily decorate the ornaments – you just might have to rip the tape for them and they can place it on wherever they like. For more washi tape ideas, feel free to check out my other posts.
The post Washi Tape Ornaments appeared first on Paper Crush.
]]>